We have finally reached the last tutorial of the Docker course. In it we will not learn anything new since, basically, it is a summary or cheat sheet with the most important commands to create images and containers and the most used lines in the Dockerfile and docker-compose.yml files.
Before that, we are going to review everything we have seen throughout the course:
- Docker in theory and important concepts, where we saw multiple topics that we later apply in practice.
- Commands for images and containers, although we did not see absolutely all the commands, we did see the most important ones, especially to learn a little about the internal machinery of Docker and how it works internally.
- How to create images with Dockerfile, although the commands are useful to understand the inner workings of Docker, the truth is that they are not often used when creating images and containers, what is really used are the files.
- How to configure a set of containers with docker-compose.yml, remember that this file uses, in turn, the Dockerfile files to create images and allows you to define the behavior of the containers as a whole so that they work safely and optimally.
- How to deploy Docker containers to the cloud and publish images on the Internet, the last step necessary so that our images can be shared and our application is accessible to the public.
We will follow a standard syntax where, for example, the brackets “[]” indicate that the element is optional.
Most used image commands
As you already know, the first step in Docker is to download or create an image and then put it into a container. In this section we will see the commands related to images that we have used throughout the Docker course:
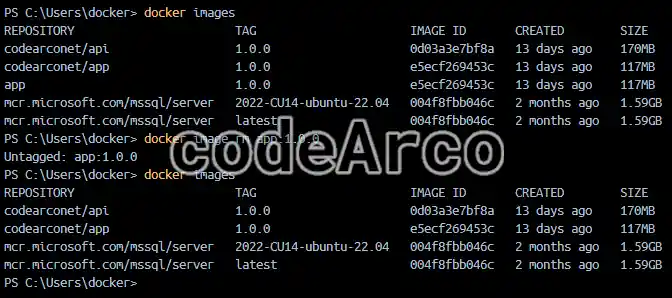
- docker images, allows you to list and view information about images downloaded with the
pullcommand or created with thebuildcommand on your computer.

Example of a docker images command to list images - docker pull image[:tag], downloads an image from a URL, it is recommended to use a tag with a specific version. We can download images from image repositories such as Docker Hub or Azure Container Registry.
- docker push image:tag to perform the opposite operation to the previous one, that is, upload an image to a repository. You must be previously logged in with the
docker logincommand. - docker image rm image[:tag], deletes a specific image on your computer.

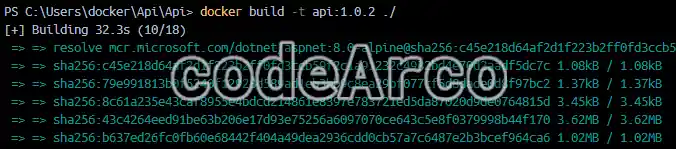
Example of a docker image rm command to delete images - docker build -t name[:tag] ./. Creates an image with the name we set using the Dockerfile file that is located in the path specified in the last parameter (./ to indicate the current folder).
Optionally, we can use tags to version them in a similar way to how we do with the code.
The -t parameter allows us to assign a tag.

Example of a build command to create images with a Dockerfile - docker image prune [PARAMETERS], removes “orphan” images that are stored in our system.
Parameters:- -a, in addition to removing orphan images, it also removes images that are not being used in any container.
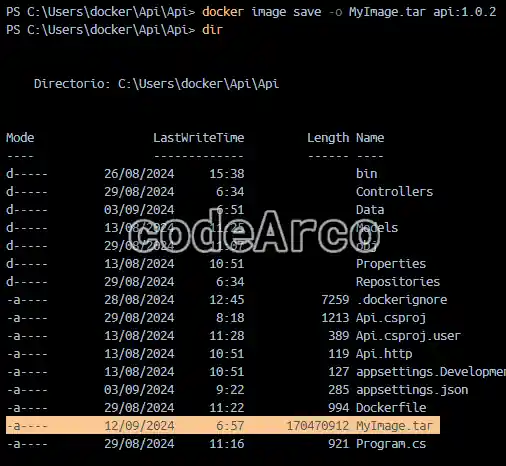
- docker image save [PARAMETERS] image[:tag], used to export an image to a compressed .tar file. It allows you to privately share images without having to use any public repository.
Parameters:- -o file.tar, to indicate the output file and its name.

Docker image save example to export images - -o file.tar, to indicate the output file and its name.
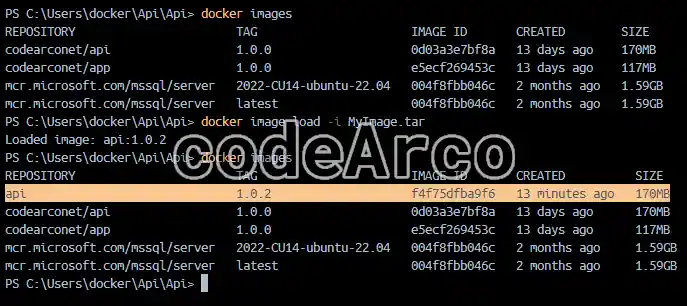
- docker image load [PARAMETERS] to create an image from a file, it is the opposite operation to the previous one.
Parameters:- -i file.tar to specify the file from which we will read the image to load it into our system.

Docker image load example to create images from files - -i file.tar to specify the file from which we will read the image to load it into our system.
- docker image tag old-name:tag new-name:tag. Creates a copy of the image with a different name. It is not a full copy, it is simply a link to the image with the old name.

Docker container commands
The next step in creating images is creating containers for which we will use the following commands:
- docker create [PARAMETERS] image[:tag], creates a container without starting it from the specified image.
Parameters:- –name Name. To assign a name to the container and then be able to reference it by its name and not by its id.
- -e parameter=’value’. Allows you to configure and set environment variables for the container.
- -p XX:YY. To map ports between the local computer and the container. XX is the host machine port (public) and YY is the container port (private).
- -v MyVolume:/home maps the previously created volume “MyVolume” to the container’s /home folder.
- –user=userName runs the container with a specific user.
- -i to run it interactively.

Example of the docker create command to create containers - docker start (id|name) starts a container given its id or name, it is necessary to specify one of the two values.
Parameters:- -i for interactive mode.
- docker stop (id|name) to stop a container that is started, same nomenclature as start, it is necessary to indicate the identifier or the name of the container in question.
- docker ps, list of containers along with useful information about them such as, for example, their id, image they use or the state they are in.
Parameters:- -a to see all containers, even those stopped.
- –size to see the size of the containers.

Example ps command to list containers - docker container rm (id|name) allows you to remove a container from your computer.
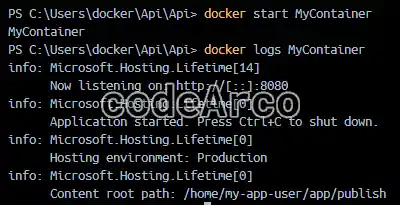
- docker logs (id|name) to see the logs once a container has been started with start command.

docker logs command for logs of started containers - docker exec (id|name) to execute commands in a container that is in a started state.
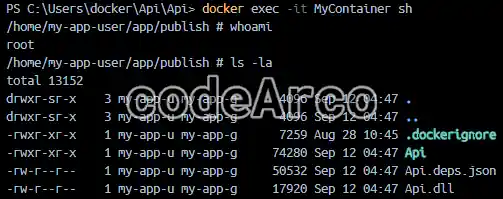
Parameters:- -it (id|name) sh, allows you to enter an active container with the indicated terminal in interactive mode (sh in this case, but it can be another one).
- (id|name) command, the same as the previous one but allows you to run only one command without entering the container in interactive mode.

Interactive mode in started container - docker container prune, removes all containers that are stopped.
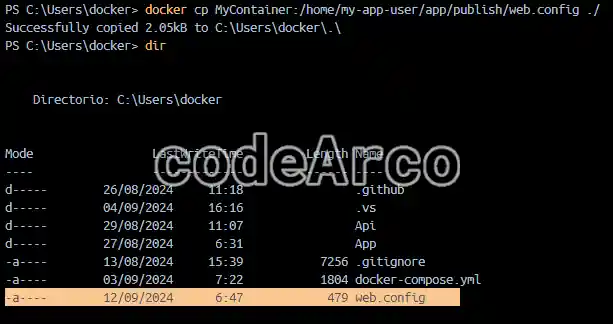
- docker cp source destination, copies files between the container and the host operating system.
The direction of the operation will depend on how we write the paths within the “source” and “destination” parameters:- If we write “(id|name):/folder/file” we are referring to a file within the container.
- If we write only “/folder/file” we are referring to a file on our computer.
- Therefore, if we use the command
docker cp MyContainer:/folder/file ./we will be copying files from the container to our local computer. - On the other hand, if we use the command
docker cp ./file MyContainer:/folder/we will be copying files from our computer to the container.

Docker command to copy files to and from a container - docker run [PARAMETERS] image[:label]. This command, as we have already seen in the Docker course, actually performs three actions. First, it downloads the image
image[:tag]if it has not already been downloaded, then it creates a container with the previous image and finally it starts the container if the previous steps have gone well.
The parameters of the run command are mostly identical to those of the create command, some of which we have used throughout this Docker course are:- -d to return control of the terminal when running it so that the container starts and we can continue entering commands.
- -it to launch it with a terminal in interactive mode, you must indicate at the end the terminal to use, such as sh. If we use
sh, theCMDcommand in the Dockerfile will not be executed and, therefore, the application will not start.

Example of run command in Docker with SQL Server



Dockerfile file summary
As we have already mentioned, the Dockerfile file is used to generate images that contain our project through instructions. Next, we will see the structure and the most important lines of the Dockerfile file:
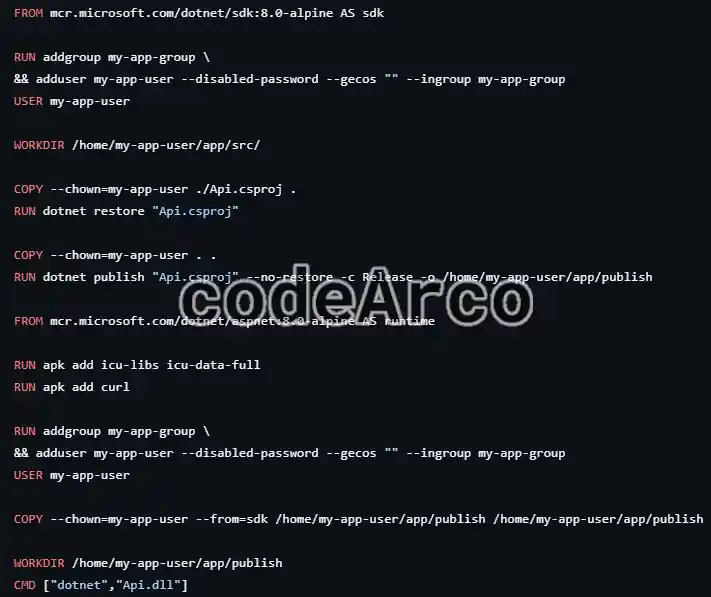
- FROM image:tag. Base image of our image.
Remember that in Docker, containers share the operating system kernel with the host system, however, it is necessary to install a base for our application to work.
Examples of base images can be Alpine (lightweight operating system), Ubuntu or even images that already have everything you need installed, such as Apache or MySQL.
Parameters:- AS alias. Establishes, for each phase or stage, an alias in multi-stage Dockerfile files.
- WORKDIR path. Allows you to change the working directory to, for example, copy files later.
- COPY source destination. Copy files or folders from source (host or server) to destination (container). Asterisks can be used in file names.
Parameters:- –chown=my-app-user to set the user under which the copy will be made and who will be the owner of the copied folders and files in the container.
- –from=alias to copy files from one stage to another in multi-stage Dockerfile files.

Example Dockerfile from copy and workdir commands - ADD source destination. Same as copy but allows a URL as an argument, such as “http://myWeb/files” and even .zip files that it decompresses. Not recommended because, having more functionality than COPY, it is heavier and makes the creation of the image take longer.
- RUN command. Execute commands (Linux or Windows) through Dockerfile.
- ARG Variable=Value. Allows you to define arguments to use during the construction of the image, not after.
- ENV Variable=Value. Set environment variables that will be used during the execution of the application in a container.
The difference between ARG and ENV is that ARG are variables used during the creation of an image and ENV are variables used during the execution of the application in the container. You can find a good explanation about ARG vs ENV in the link above. - EXPOSE port. Access ports, be careful, this is only for informational purposes, this does not allow access to the Docker container, what really allows access is
docker run -p XX:YYor its equivalent in the docker-compose.yml file. - USER my-user. User under which the container will be run or, better said, user under which the instructions that follow will be executed. It is recommended to change it to one other than root.
It only applies to all commands that are RUN, CMD or ENTRYPOINT and that are after the USER line.
As a consequence of the above, for the COPY command, we must indicate the owner user explicitly as we saw previously:COPY --chown=my-app-user ./ /usr/local/apache2/htdocs/ - CMD [“command1”, “command2”]. Execute commands, the difference with RUN is that RUN is executed while the image is being created and CMD when the container is started.
- ENTRYPOINT [“command1”, “command2”]. It is exactly the same as the previous one, the difference is that if we want to replace the command in
docker run image echo hello, with CMD we can do it as it is, but with ENTRYPOINT, we must add –entrypoint, that is,docker run image --entrypoint echo hello.

Commands for docker-compose.yml
As we saw in the theory, docker-compose.yml is used so that we can build and run a set of containers with all the necessary configuration. To create images, if necessary, it uses the Dockerfiles of each of the containers.
Next we will see the most important and used commands in docker-compose.yml:
- docker compose [PARAMETERS], executes the docker-compose.yml file from the current directory.
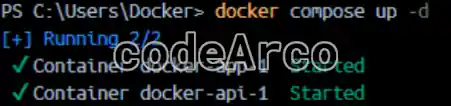
Parameters:- up, is the parameter that actually starts all the containers by building, if necessary, the images from the Dockerfile files.
- -d, detach mode, to not show the logs when starting the containers.

Example of docker compose up - -d, detach mode, to not show the logs when starting the containers.
- build, tells Docker to create the images from start without using any previously created ones, useful for debugging errors. It does not start containers, it only creates images.
- –no-cache to not use the cache when creating images, useful for debugging errors and recreating images.
- create, similar to up, the difference between up vs create in compose is that
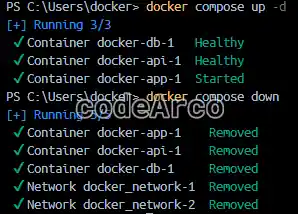
createonly creates containers, it does not start them automatically. - down, stops and removes containers and networks that have been created with the docker-compose.yml file.

Example docker compose up and down - logs, to see the logs of the containers created once they have been started.
- -f to follow the logs as they are generated.
- -t to see the timestamps of each one of them.
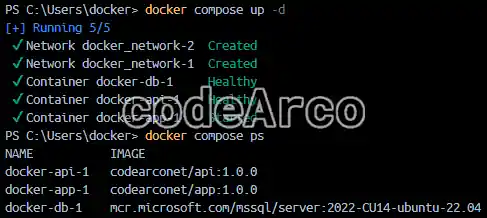
- ps, to list the containers used by docker compose.

Example docker compose ps to list containers
- up, is the parameter that actually starts all the containers by building, if necessary, the images from the Dockerfile files.
docker-compose.yml most important lines and summary
In the previous section we talked about commands, now it is the turn of the most important parts of the docker-compose.yml file:
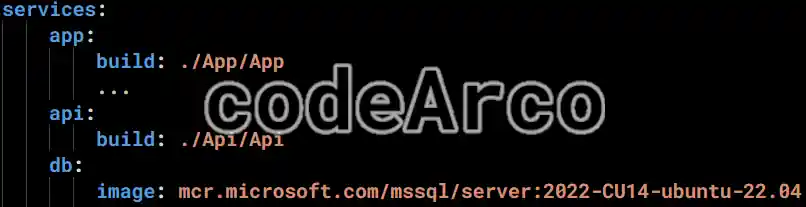
- services, to indicate the parts that make up our project. Each service will have its own name, such as API, APP and DB.
Important, the name can be used to allow communication between them without needing an IP.
Parameters for services:- image, external image that the container will use, it must be hosted on a system to upload images.
- build, internal image, where the Dockerfile that we will use to build the image is located.

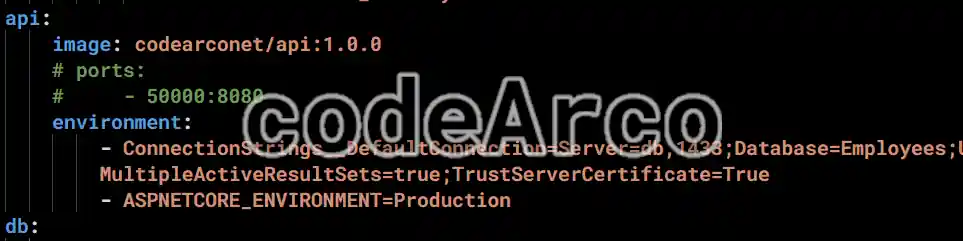
docker-compose yml services build vs image - ports, used to map local ports of the container with external ports of the host machine, format XX:YY where XX is the port of the host machine and YY is the port of the container.
- environment, to set the value of environment or configuration variables that will be used while the container is running.
Form 1, “Variable:value”.
Form 2, – “ParentVariable__ChildVariable=Value”, used to set environment variables with children in docker-compose.yml.
In the values we can use the name of another service instead of an IP.

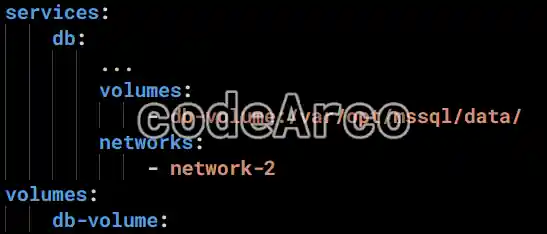
Example of configuration variables and ports in docker-compose yml - volumes allows a container to use as persistent storage a volume that we will create later, outside the service section.
Format “volume-name:container-folder-path”. - networks, to assign one or more networks to the container, as many children as networks we want to add.

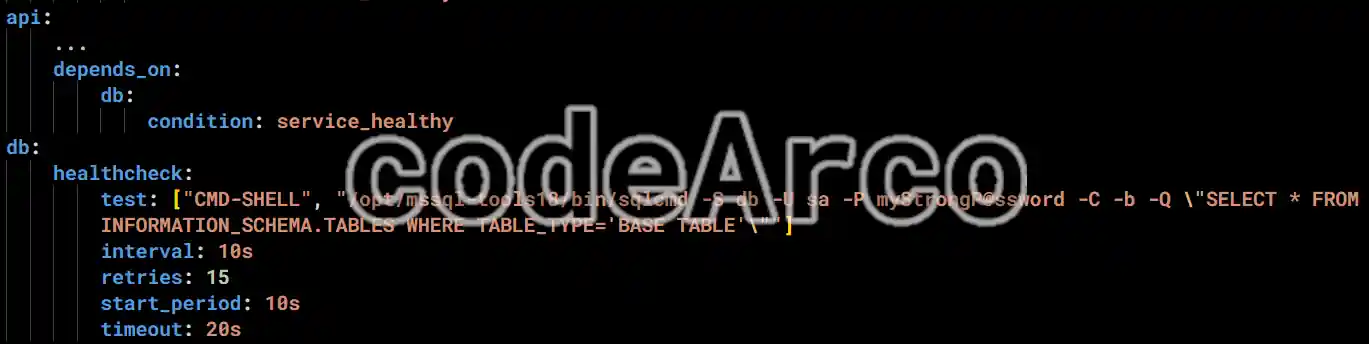
docker-compose yml example volumes and networks - depends_on followed by a list of service names indicates the services that the current container depends on. It allows us to define the order of execution and the dependencies.
By default Docker only verifies that the container it depends on is running, nothing more.
If we want to tell it to verify that the container it depends on is running correctly, we must use the optioncondition: service_healthy. - healthcheck, indicates, for a container X, when its status is “service_healthy”.
To run a specific health test with the terminal, we will use as a subsection the commandtest: ["CMD-SHELL", command]and, optionally, theinterval, retries, start period and timeoutinstructions.
If a container Y depends on container X and has thecondition: service_healthyline inside thedepends_on, container Y will not start until thehealthcheckof container X is met.

docker-compose yml example depends_on and healthcheck
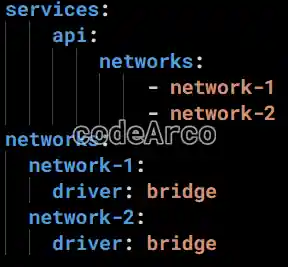
- volumes, section to create volumes, it only needs to have as many children as volumes we want to create. Then it will be necessary, as we have seen, to assign it to each service through the
volumesinstruction. - networks, allows you to define a list of networks to create. Then we will assign them to each service simply with the
networkssection within each of them.
In addition, we must indicate the network driver, which can be bridge, host, overlay and none among others.

Example of networks in docker-compose yml file
Other useful Docker commands
We come to the last section where we will see commands that, although they have nothing to do with creating images, running containers or running files, throughout this Docker course they have been useful commands:
- docker version, to know the installed version, it also serves to check that the installation is correct and to see information about the tool.
- docker command –help, allows you to get help on a specific command such as, for example,
docker start --helpprovides us with a summary with the functionality of the start command along with the arguments that we can use. - docker volume create MyVolume, creates the volume with the name “MyVolume” for data persistence between containers, it must be assigned with the command
docker create -v MyVolume:/home. - docker volume inspect MyVolume, to see information about a specific volume.
- docker system prune -a, is used to remove all containers, images and cache that we have in Docker, use it carefully!
- docker login to log in to Docker Hub and upload images to our repository.
- docker network to view information about networks.
- ls allows you to list all the local networks created.
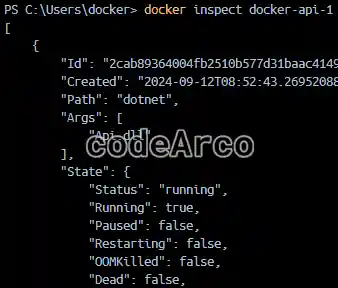
- docker inspect (id|name), allows you to view information in json format about Docker objects such as containers and images.

Example of the docker inspect command in a container - service docker start, to start the Docker service in Linux environments.