Sometimes, just like with changing the Office and Excel language, you’ll find tutorials on the Internet to modify certain aspects of Visual Studio that are in English and perhaps you have the IDE in another language.
Well, for cases like this, we’ll see how to install and change the language in Visual Studio.
How to install a new language in Visual Studio
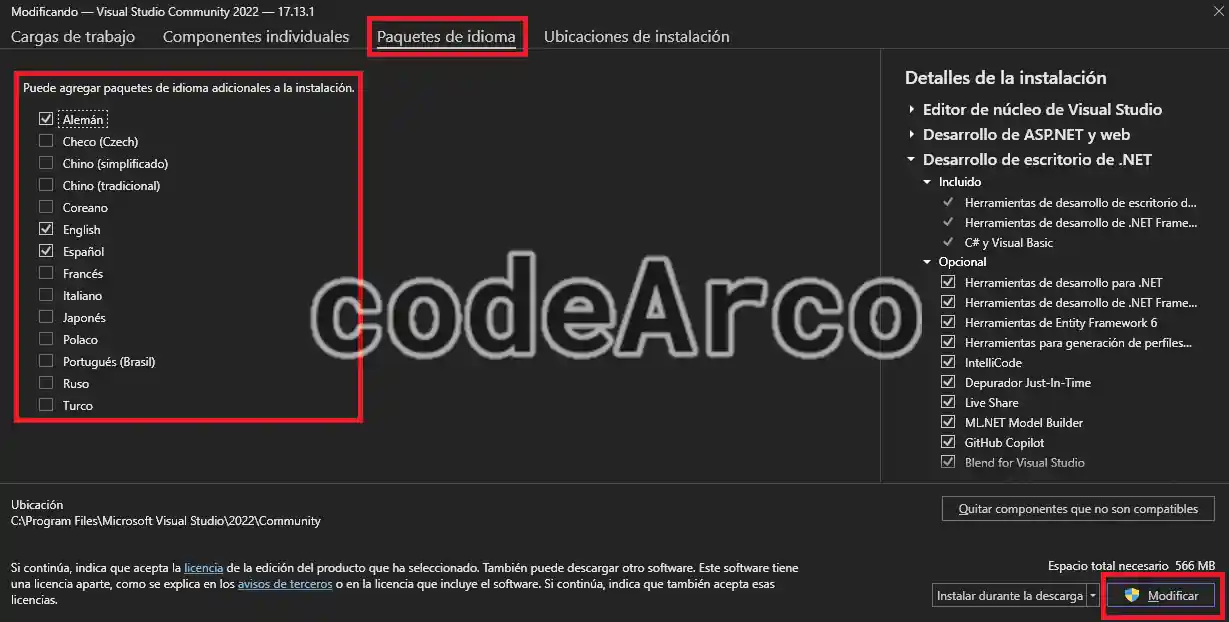
The first step is to install the language in Visual Studio following these steps:
- Search for “Visual Studio Installer” in Windows search and click on it.
- Select the “Modify” option to see which components and languages you have installed in the IDE.
- Go to the “Language Packs” section at the top.
- Select the options to install and then click the “Modify” button at the bottom. Follow the wizard and wait for the installation to finish.

Install language in Visual Studio
Once the language is downloaded it will be available to select and change through the IDE options.
How to change the language in Visual Studio
The second step is to change the language in Visual Studio, to do this:
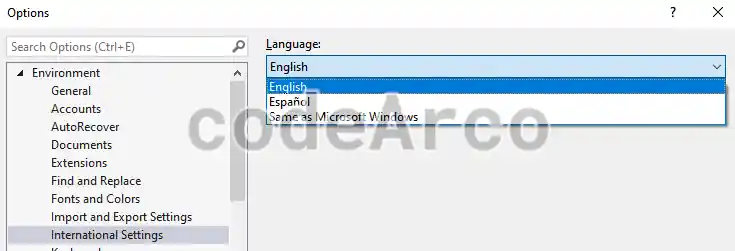
- Access the “Tools”, “Options” menu located at the top of the IDE.
- In the “Environment” section locate the “International Settings” option.
- Select the option you want from the drop-down menu. Then, click the “Ok” button.

Change Visual Studio Language - Close and reopen the program since, as the message indicates, the changes will not take effect if you do not do so.
Finally, after restarting, verify that the interface and menus have changed to the language you selected.