
In this article we will see how to create watermarks on images massively and individually through Gimp.
As we have already mentioned in other articles, Gimp is a professional, free and very powerful image editing software that we can use for multiple purposes such as, for example, reducing the size of multiple images at the same time, blur parts of an image or create icons. You can download it through the official Gimp website.
To create watermarks on images with Gimp there are several alternatives, such as using plugins such as TextWatermark or ImageWatermark. In our case we will not use any plugin, we will play with the layers and their transparency.
How to create a text watermark
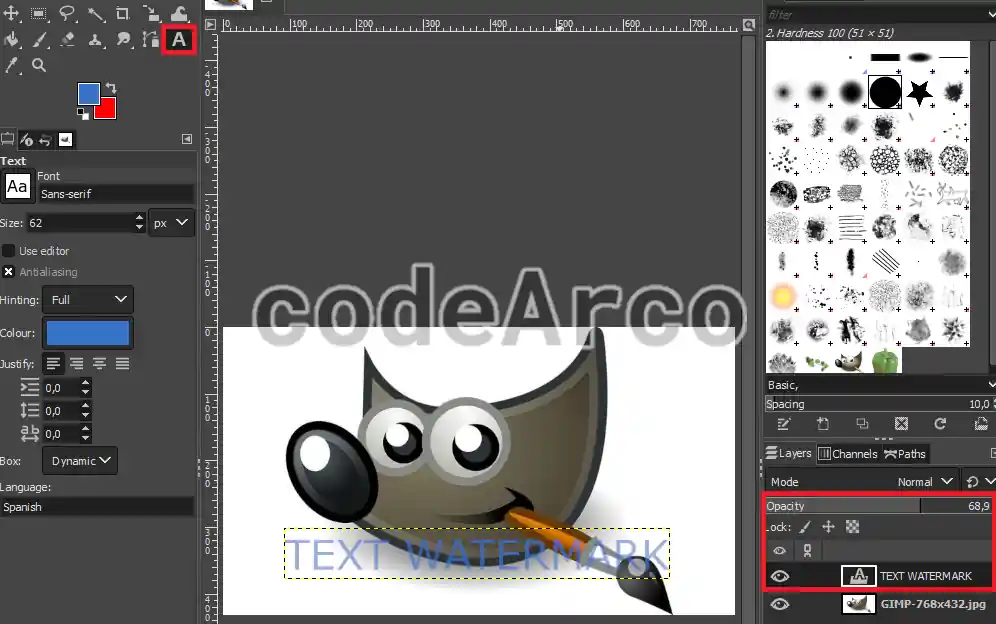
If what we want is to add a text watermark, all we have to do is look for the Text icon in the upper left corner. After that, we click on the part of the image where we want to put it, write the text and give it the desired format.
Once the text is in the image, in the layers panel at the bottom right, we must select the text layer that we just introduced and reduce the opacity until it is to our liking.
How to create an image watermark
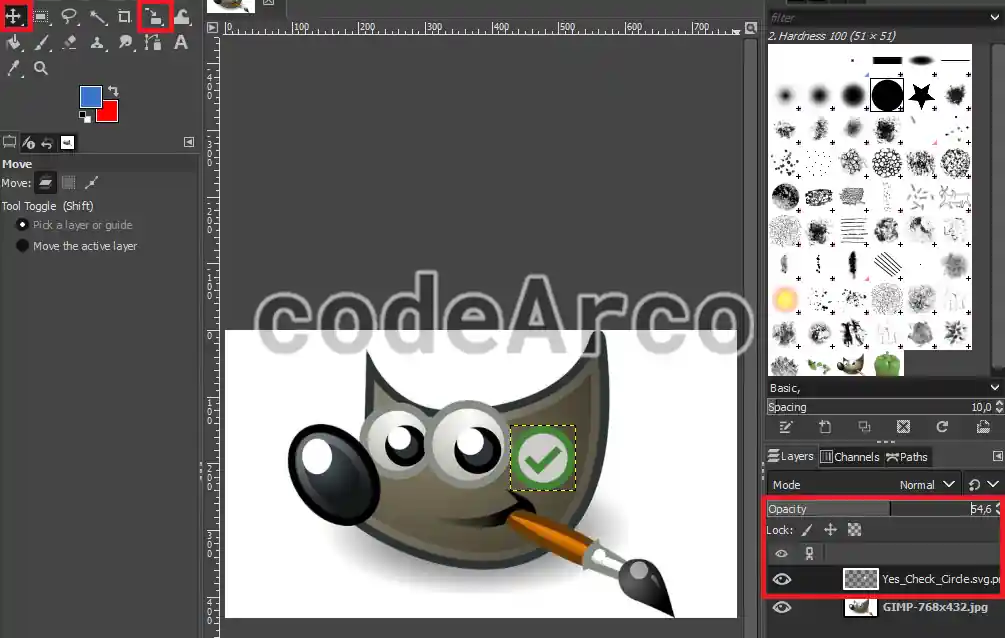
If, on the other hand, what we want is to add an image as a watermark we must go to “File”, “Open as layers” and select the desired image. I recommend that you use images with transparent backgrounds, the only formats that allow this are PNG and TIFF.
Once the image is open we can scale it with the scaling tool and move it with the movement tool. Additionally, through the opacity bar and with the new image layer selected, as before, we will be able to adjust the transparency of the watermark.
Needless to say, both processes are not incompatible, that is, we can simultaneously introduce a watermark with text and image if we follow all the previous steps.
Once our watermarks have been created, it will be necessary to store the final image. To do this we will go to “File”, “Export as”. At the bottom right we will click on “Select the file type (By extension)”, select the desired one (for example JPEG) and click on “Export”.
In the window that appears we can play with various values such as the quality of the exported image or whether or not we want to store certain data. Once configured, click on “Export” and it will be stored in the selected folder.
Watermark multiple images at once
The process for massively watermarking multiple images is a little more complex. To do this we will need help from a plugin called Bimp.
Keep in mind that Bimp is not compatible with Gimp version 3 and higher. If this is the case, you’ll need to use the linked guide instead of the one shown below.
Once installed we will go to “File”, “Batch image manipulation”. We will click on “Add” and, in the new window, we will select “Add watermark”.
Unlike individually, bulk watermarks with this plugin can only be text or image, not both at the same time. If you need both at the same time, I recommend that you make an image with text and a transparent background and select the “Watermark – Image” option with said image.
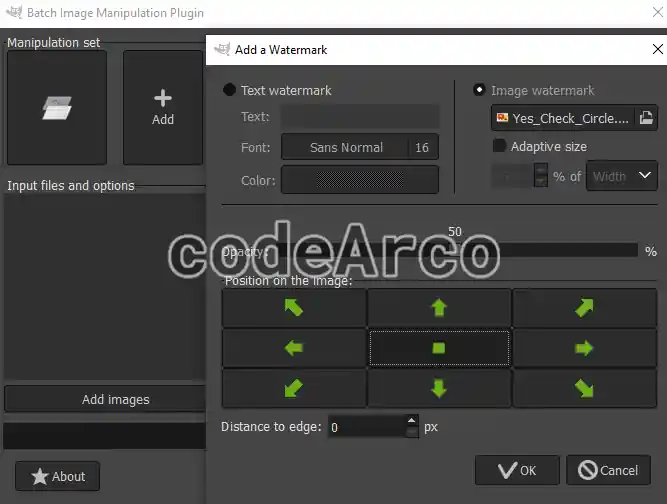
As you can see, you can configure the font or size of the image. In both cases you can configure the opacity and position.
Once the watermark parameters have been configured, we will click on “OK” and select the images to which we will apply the settings. We can select them one by one or by folder. Once chosen, you will only need to click on “Apply” and the images with their respective watermarks will be saved in the specified output directory.