
What is Google Tag Manager and what is it for?
Google Tag Manager is the Google tag administrator, completely free. A tag is a piece of code that allows you to do multiple things, such as sending website statistics to an external system.
If we remember, one of the essential steps when configuring Google Analytics 4 GA4 and Google Search Console was to verify the ownership of the website and we achieved this by inserting a tag in the <head>:
<head>
    <meta> Google Analytics tag </meta>
    <meta> Search Console tag </meta>
</head>
This, on a simple website that does not require sending statistics to other systems, is not a problem but… What happens if tomorrow we have to add a third tag? Well, we must touch the previous code and add another line:
<head>
    <meta> Google Analytics tag </meta>
    <meta> Search Console tag </meta>
    <meta> External System Tag </meta>
</head>
Tag Manager is used to simplify these scenarios, in such a way that it allows us to create a single tag that will act as a container and will allow us to add, edit and delete multiple tags without having to touch code and using only a centralized interface.
<head>
    <meta> Tag Manager label </meta>
</head>
Although this is not related with SEO optimization in search engines, I consider it necessary to refer to it since it will greatly simplify our work when verifying the ownership of the website in tools such as Google Analytics 4 and Google Search Console.
How to install and configure Google Tag Manager
The first thing we will do is log in to Tag Manager.
After that, we will follow the following steps to configure Google Tag Manager:
- Select “Create Account”.
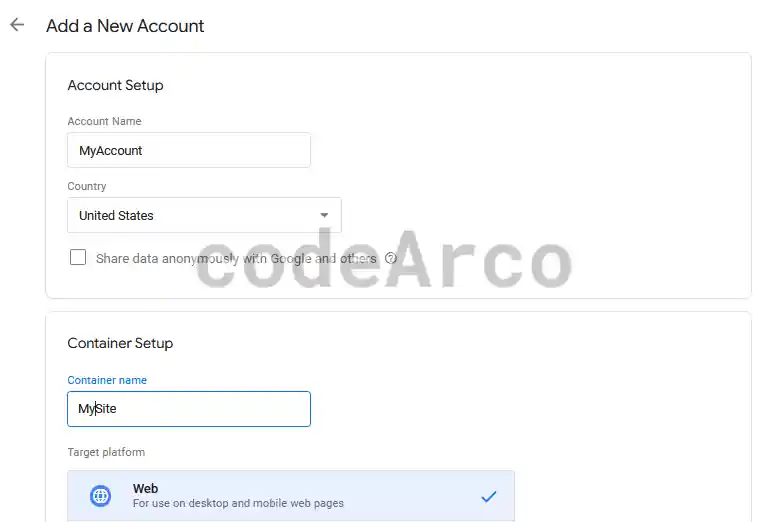
- Fill in the account data paying special attention to the name of the account and the name of the container, generally there is one container for each managed website. Additionally, if we are going to use it on a website, we will select the “Website” option.

Create Google Tag Manager account - Click on Create, accept the terms and we will reach the following page with the instructions to install Google Tag Manager:

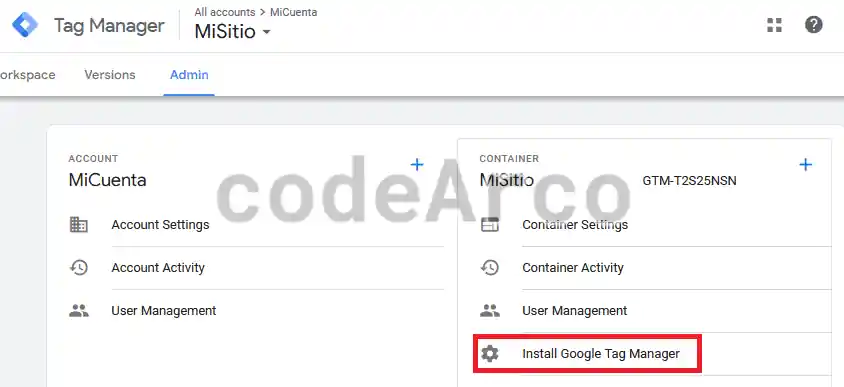
Instructions to install Google Tag Manager - If we ever need to return to this screen, it is located in the Admin, Container, Install Tag Manager section:

Install Google Tag Manager
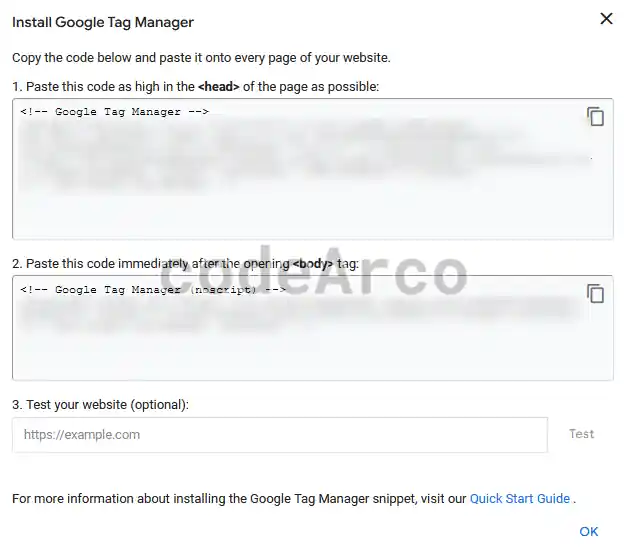
As the instructions themselves indicate, we will follow the following steps to install Tag Manager on our website:
- Paste the first code snippet as high as possible in the <head> section.
- Paste the second code snippet right after the opening <body> tag.
It is important to keep in mind that if we already had a Google tag on our site, such as Google Analytics 4 GA4, it is time to delete it before adding this one. Remember that the objective of this tutorial is to introduce all tags through a single Tag Manager container tag.
Another point to keep in mind is that content managers like WordPress have plugins for Tag Manager and, therefore, we have the option of doing it through them or directly touching the code. The recommended option is to touch the code directly so as not to overload the website with plugins.
How to verify correct installation of Google Tag Manager
After having installed and configured the tags on our website, we will follow these steps to verify that Google Tag Manager is installed correctly on our website:
- Review HTML code with correct tags. We will go to Tag Manager and write down its corresponding code. Then we will inspect the website code in Firefox or Chrome (Ctrl + Shift + I) and verify that the code that we have entered both in the head and after the body is really inserted and that it has the code that we have pointed out.

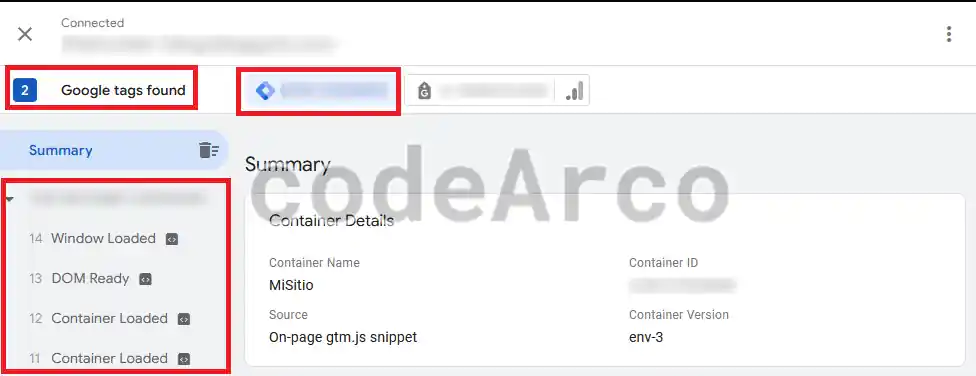
Google Tag Manager Code - Use the preview. When we click on this button, a new tab with our website will open and the message “Tag Assistant Connected” should appear. We perform some actions on the web such as clicking a link and scrolling.
Then we will verify that the message “N Google tags found” appears, that the code that we pointed out at the beginning appears to the right of said message and, as we carry out actions on the web, the left menu is filled with elements.

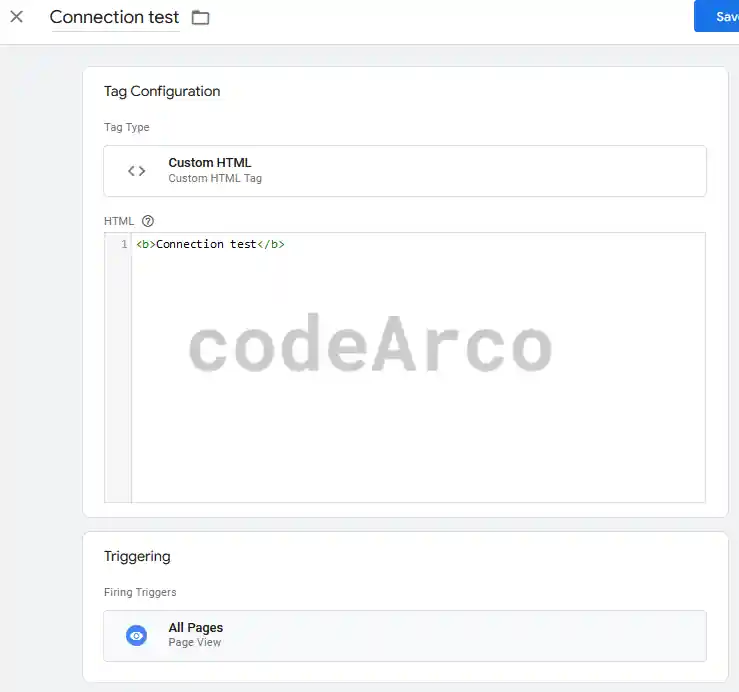
Google Tag Manager preview - Create a test tag to see if it actually inserts into the web. To do this, within “Overview”, select “Add new tag”, give it as name “Connection test”, as type “Custom HTML” and as activator “Page view, all pages”.
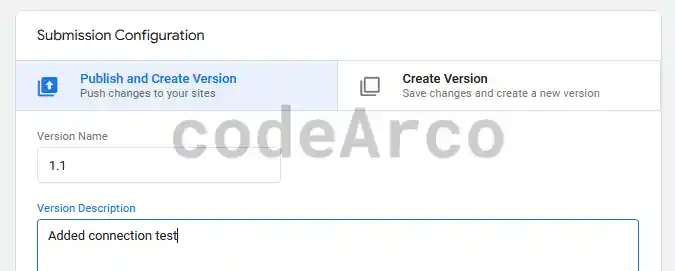
We click on save and, very important, we select “Send” so that the changes are applied to our website. In the next window we give a version and a description and select “Publish”.
Finally, through the browser debugger (Ctrl + Shift + I) we will verify that the code has been inserted at the end of the <body> element.
Remember to remove the test label when you are finished.

Add test tag to Google Tag Manager 
Publish tag Google Tag Manager - Test from Google Tag Manager. We can access this section through Admin, Container, Install Tag Manager. At the bottom of the page we put the url of our site and select Test.
It is not the recommended method because it can fail, as you can see, despite having passed the previous tests, this section shows us the message “Your Google tag wasn’t detected on your website” This is probably because it conflicts with the Google Analytics 4 GA4 tag that we previously had.

Google Tag Manager test


How to connect Google Tag Manager and Google Analytics 4 GA4
One of the requirements to use Google Analytics 4 GA4 with our website is to verify ownership, that is, prove to Google that we really are the owners of the website.
To do this, we will follow the following steps to verify Google Analytics 4 GA4 with Google Tag manager:
- Log in to Google Analytics 4 GA4.
- Create an account and a property by filling in all the information requested.
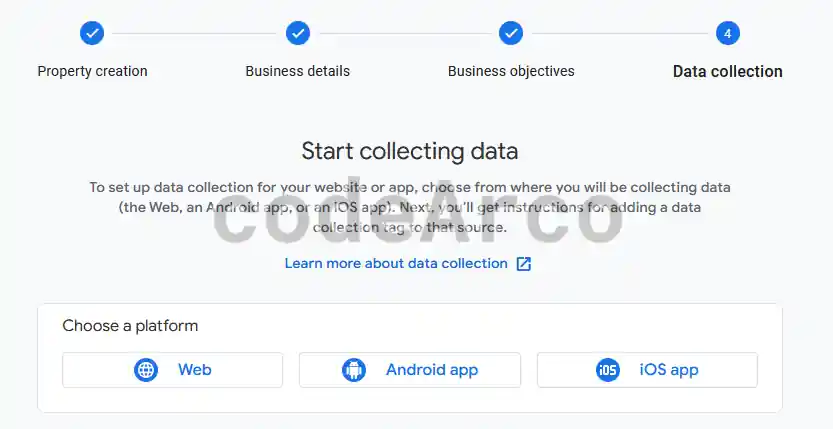
- Select the type of platform we are going to use, in this case, web.

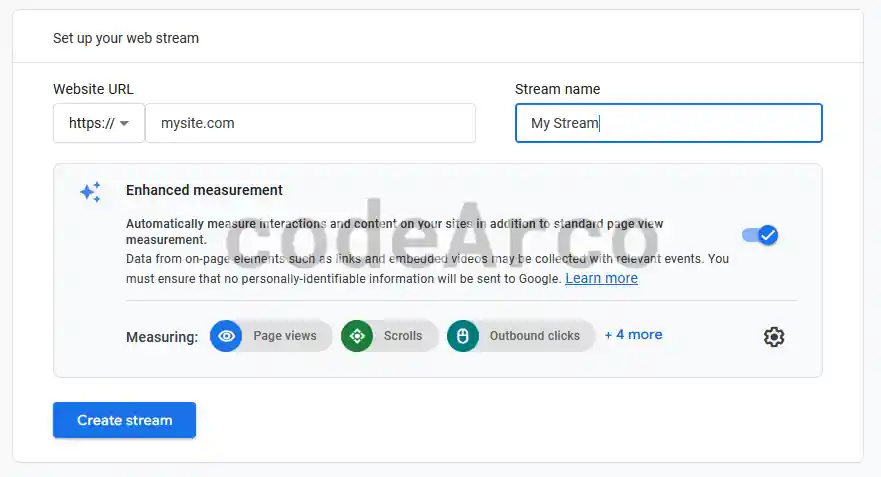
Google Analytics 4 GA4 choose platform - Create a web stream indicating the url of the website and the name. At this point it is interesting to enable enhanced measurement.

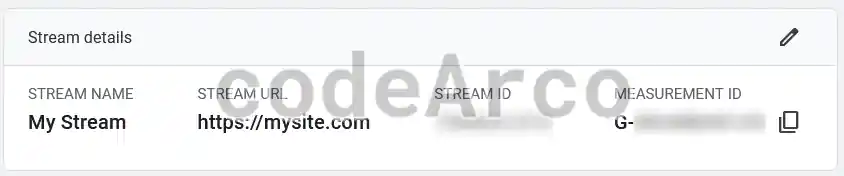
Google Analytics 4 GA4 create web stream - We must annotate the measurement id once the flow is created.

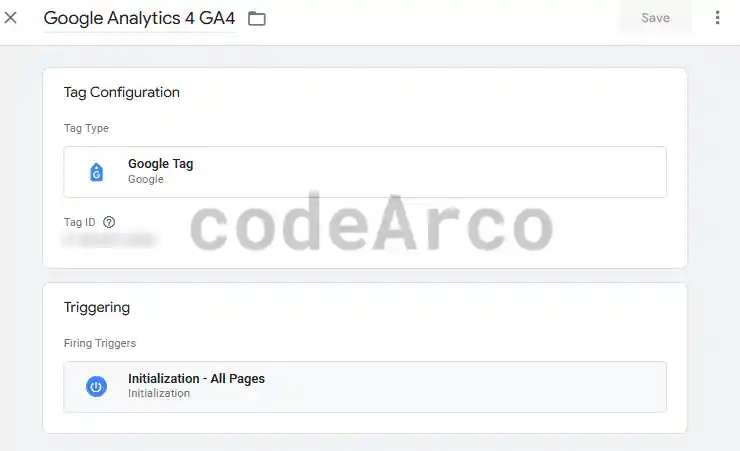
Google Analytics 4 GA4 measurement id - Create a tag in Google Tag Manager with the following configuration: As a name we will give it “Google Analytics 4 GA4”, as a type we will select “Google Analytics”, “Google Tag” and within the tag id we will paste the value that we have noted before and finally, in activation we will select “Initialization – All Pages”.
We save the changes and, importantly, we must send them to take effect on our website.

Google Analytics 4 tag in Google Tag Manager - Check the data collection in Google Analytics 4 GA4. To do this we have two options, on the main page we examine whether the message “Your website’s data collection is active” appears and, on the other hand, if we go to the real-time reports, at least one connected user who is ourselves must appear.

Verify Google Analytics 4 GA4 and Google Tag manager

How to connect Google Tag Manager and Google Search Console
One of the necessary steps to enjoy Google Search Console on our website is to verify ownership, that is, prove that the website is really ours.
To do this, we will follow the following steps to verify Google Search Console with Google Tag manager:
- Log in to Google Search Console.
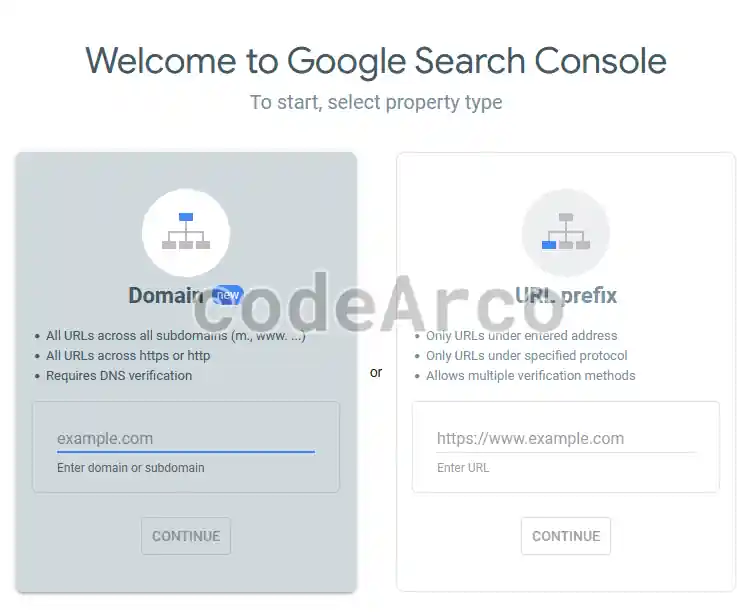
- Create a domain property. Don’t forget to remove the http:// and the / at the end of the url.

Google Search Console create property - Choose the Google Analytics verification method. Since we have previously configured Google Analytics 4 GA4 and Tag Manager, we can avoid unnecessary work by choosing this option. Of course, keep in mind that the user you use in Search Console in this process must have editing permission in Analytics.
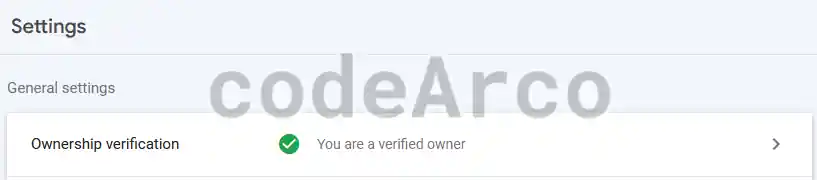
- Finally, we check the ownership verification in Google Search Console by going to “Settings” and, in “Ownership Verification”, the message “You are a verified owner” should appear.

Check Google Search Console and Google Tag manager
At this point, do not forget that you must link Google Analytics 4 GA4 and Google Search Console.
Google Tag Manager, WordPress and Blogger
Although the steps to configure Tag Manager above are simple, there are some CMS that provide us with plugins and facilities when doing so. However, in order not to saturate the website with unnecessary extra content, the recommended option is not to use plugins and modify the code directly.
On the one hand, the steps to configure Google Tag Manager in WordPress are:
- Access the files through Tools, Theme File Editor.
- Edit the header file, usually called header.php.
- Paste the code fragments that Tag Manager has provided us in the <head> and <body> sections.
- Save the file by clicking Update File.
However, as a recommended method, we can insert the codes more comfortably through the WPCode plugin.
On the other hand, the steps to configure Google Tag Manager in Blogger are:
- Access the files through Themes, Customize, Edit HTML.
- Paste the code fragments that Google has provided us in the Blogger editor, as far above the <head> as possible and just after the opening of the <body>.
- Save the file.
- If you see an error when saving, you must replace the “&” with “&”.
The way to verify that both processes are correct is identical to what was mentioned above, that is, we will verify the process in both Google Analytics and Search Console as we have explained in the sections above.