Change styles of Markdown code in VSCode
First, let’s start with the easiest part, the steps to customize the appearance of Markdown code in VSCode:
- Open an
.mdfile with content in VSCode. - Open the VSCode token inspector. To do this, with your Markdown file open, press
Control+P, type>Developer: Inspect Editor Tokens and Scopes, and pressEnter. - Note the identifiers of the elements you want to customize. With the Token Inspector activated, click on the elements you want to modify and select the first selector in the
textmate scopessection.
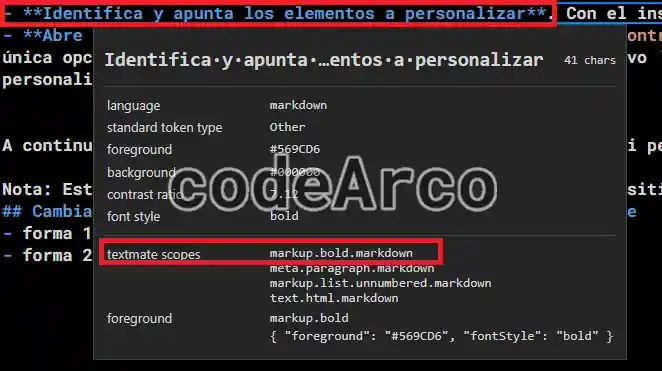
For example, to customize the bold style, we’ll use and select themarkup.bold.markdownselector:

Example selector to change Markdown code styles in VSCode - Open the VSCode JSON configuration. To do this, press
Control+P, type> Preferences: Open User Settings (JSON)and click the only option that appears in the drop-down menu. Thesettings.jsonfile will open. Keep it localized because we’ll use it to customize the Markdown code style. - Modify the
settings.jsonfile and add a code block like the following example. Within thetextMateRulessection, add as many blocks as the number of elements you want to customize:// ************************************************************************* // * MARKDOWN // ************************************************************************* "editor.tokenColorCustomizations": { "textMateRules": [ { "scope": "markup.bold.markdown", "settings": { "foreground": "#ff0000", } }, ... ETC, OTHER RULES HERE ] },
Below is the full example for modifying Markdown code styles in VSCode that I use:
// *************************************************************************
// *                MARKDOWN
// *************************************************************************
"editor.tokenColorCustomizations": {
    "textMateRules": [
        // HEADINGS
        {
            "scope": "markup.heading.markdown",
            "settings": {
                "fontStyle": "bold underline",
                "foreground": "#0091bd"
            }
        },
        // BOLD
        {
            "scope": "markup.bold.markdown",
            "settings": {
                "fontStyle": "bold",
                "foreground": "#bd0000"
            }
        },
        // CODE INLINE
        {
            "scope": "markup.inline.raw.string.markdown",
            "settings": {
                "fontStyle": "bold",
                "foreground": "#00bd00"
            }
        },
        // CODE NOT INLINE
        {
            "scope": "markup.fenced_code.block.markdown",
            "settings": {
                "fontStyle": "bold",
                "foreground": "#00bd00"
            }
        },
        // LINK TEXT
        {
            "scope": "string.other.link.title.markdown",
            "settings": {
                "fontStyle": "bold",
                "foreground": "#bdba00"
            }
        },
        // IMAGE TEXT
        {
            "scope": "string.other.link.description.markdown",
            "settings": {
                "fontStyle": "bold",
                "foreground": "#bdba00"
            }
        }
    ]
}
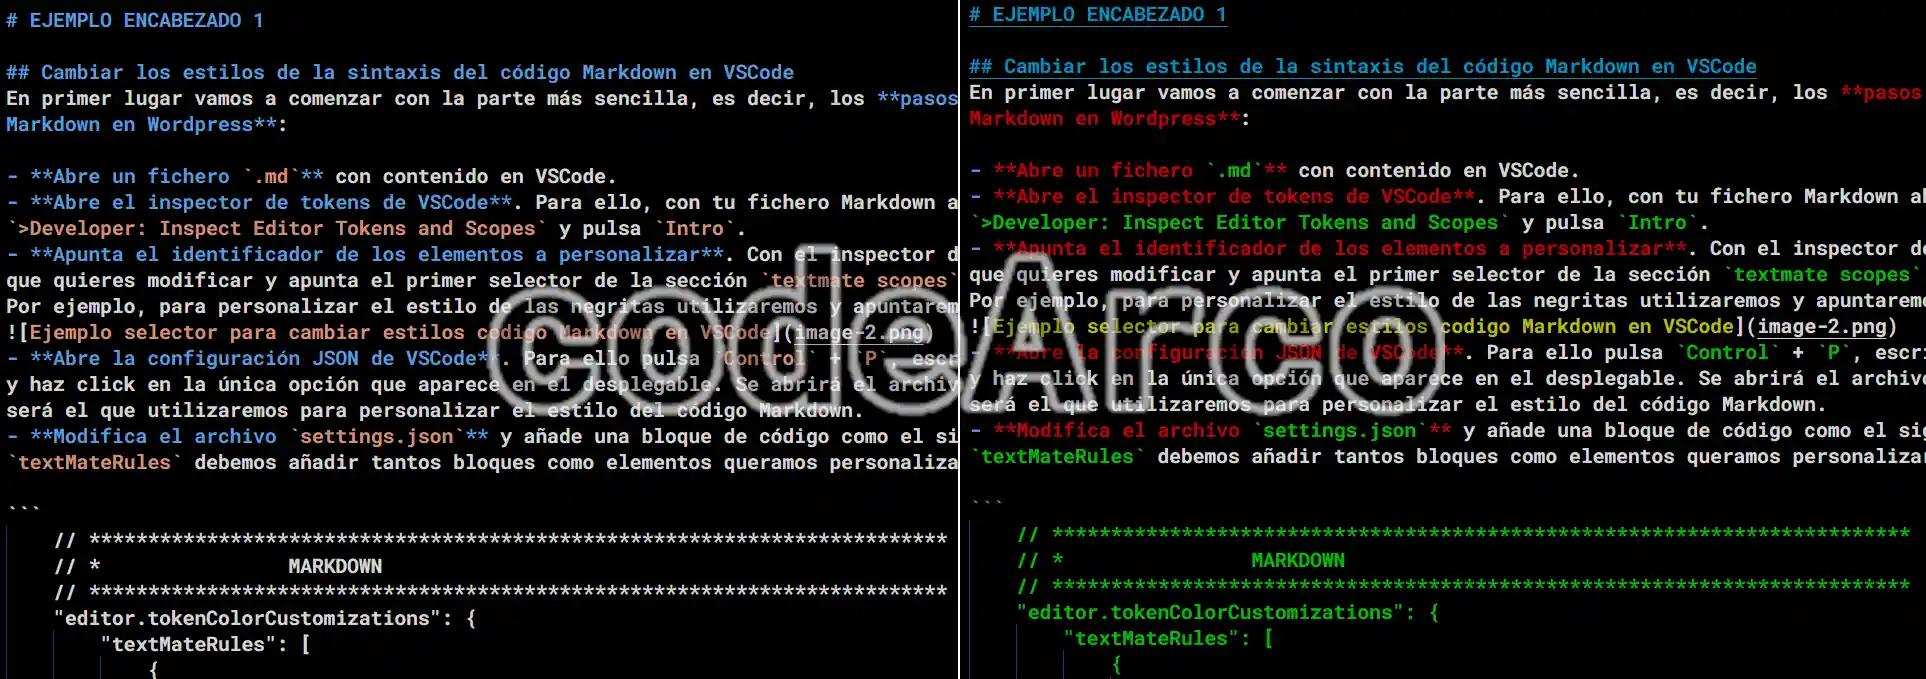
And this is the result of customizing the style in VSCode for Markdown files before and after:
In addition to the following, I would like to comment on some important points regarding this section:
- This configuration is cross-device, meaning VSCode is able to sync changes to the cloud so that they are available on other computers.
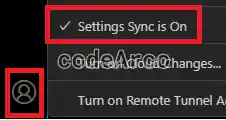
For VSCode to sync changes to thesettings.jsonfile, you must go to the user icon in the lower left, log in with your Microsoft account, and make sure theSettings Syncoption is set toOn:

How to enable cloud sync for settings - You cannot change the background color or other advanced features using this method. If you need more in-depth customization, you should use the highlight plugin and use the following advanced customization tutorial for Markdown and VSCode as a reference.
Personally, I prefer not to install many plugins and keep the editor light and efficient. - You don’t always have to select the first selector within the
textmate scopessection, it can be any of them, but keep in mind that the lower the selector is within the section, the more generic it will be and the more elements it will affect.
This means that if you use a very generic selector it can be applied to other file types such as C# code files.
To prevent changes from spreading to places they shouldn’t, I recommend making sure your selectors end in.markdownto be as specific as possible. - If you want to close the VSCode Token Inspector (since it’s quite annoying) just follow the same steps we used to open it.
Change styles of Markdown preview in VSCode
Now we’ll move on to the slightly more complex part, modifying the Markdown preview style in VSCode. Keep in mind that there are two methods for doing this:
- Method 1: Using a local configuration file. The disadvantage is that this method isn’t valid for multiple workspaces or multiple devices, you’ll only have the customization available on the workspace and computer where you make it.
- Method 2: Using a remote file hosted on GitHub. The advantage of this method is that you can have the modification available on different computers and workspaces without having to repeat the change on all of them. The disadvantage is that it’s a slightly longer and more complex process.
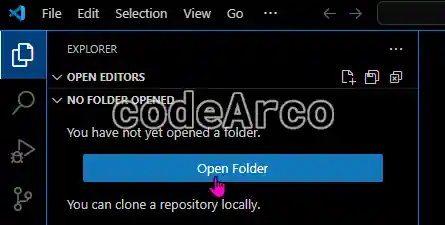
Note: a Workspace is the folder or project you open in VSCode using the Open Folder button:
Using a local configuration file
The advantage of this method is that it’s easy, you only need to create a file in the current workspace.
The disadvantage of this method is that it doesn’t work for multiple workspaces or multiple computers. Any changes you make in one workspace must be manually replicated across all the workspaces and computers you use.
The steps to modify the Markdown preview styles in VSCode are:
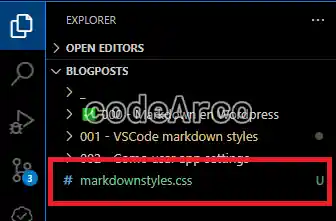
- Create the styles file in the root folder of your workspace or project with the name
markdownstyles.css:

CSS styles for Markdown preview in VSCode - Reference the styles file in the VSCode JSON configuration. Use the
Ctrl+Pcommand and type> Preferences: Open User Settings (JSON). Enter the following line along with the changes we made in the previous sections:
// ************************************************************************* // * MARKDOWN // ************************************************************************* // Preview markdown "markdown.styles": ["markdownstyles.css"], - Open the Markdown preview. To do this, right-click on the Markdown file and click
Open Preview. - Open the VSCode HTML inspector to view the tags of the elements you want to customize. To do this, press
Control+Pand type>Developer: Toggle Developer Tools.
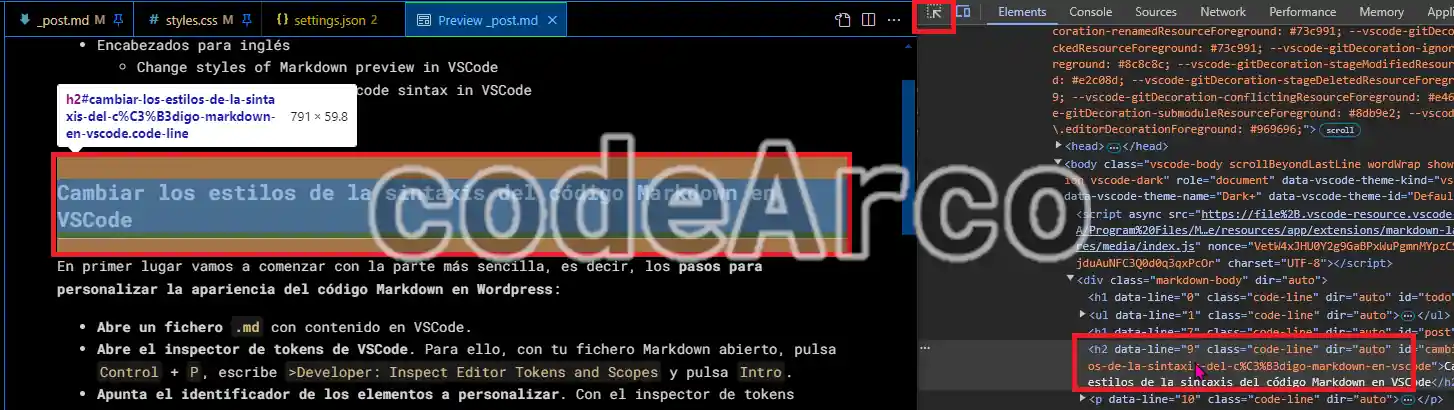
This inspector is the same as the one in the Chrome browser and, therefore, works exactly the same as if we were styling a web page with HTML and CSS.
For example, to find out which tags the headings use, simply use the selection tool located in the upper left corner of the inspector and click on the element you want to analyze. In this case, we can see that the HTML tag for one of the headings is an H2:

VSCode HTML inspector for Markdown - Fill the
markdownstyles.cssfile with the styles you want to apply to the preview. For example, we can enter the following lines:/* GENERAL */ body{ font-family: "Roboto Mono", monospace; font-size: 16px; } /* HEADINGS */ h1 { background-color: #0091bd; color: white; } h2{ background-color: #bfe3ee; color: black; } - Check that the changes have been applied in the Markdown preview.
Below is a full example of CSS styles for the Markdown preview in VSCode:
/* GENERAL */
body{
    font-family: "Roboto Mono", monospace;
    font-size: 16px;
}

/* HEADINGS */
h1 {
    background-color: #0091bd;
    color: white;
}

h2{
    background-color: #bfe3ee;
    color: black;
}
h3{
background-color: #ffffff;
color: gray;
}
/* LISTAS BULLET */
::marker{
color:#0091bd;
}
/* BOLD */
strong {
color: #bd0000;
font-weight: bolder;
}
/* CODE */
pre code, code{
color: #00bd00;
}
/* LINKS */
a, a:hover, a:visited{
color:#bdba00;
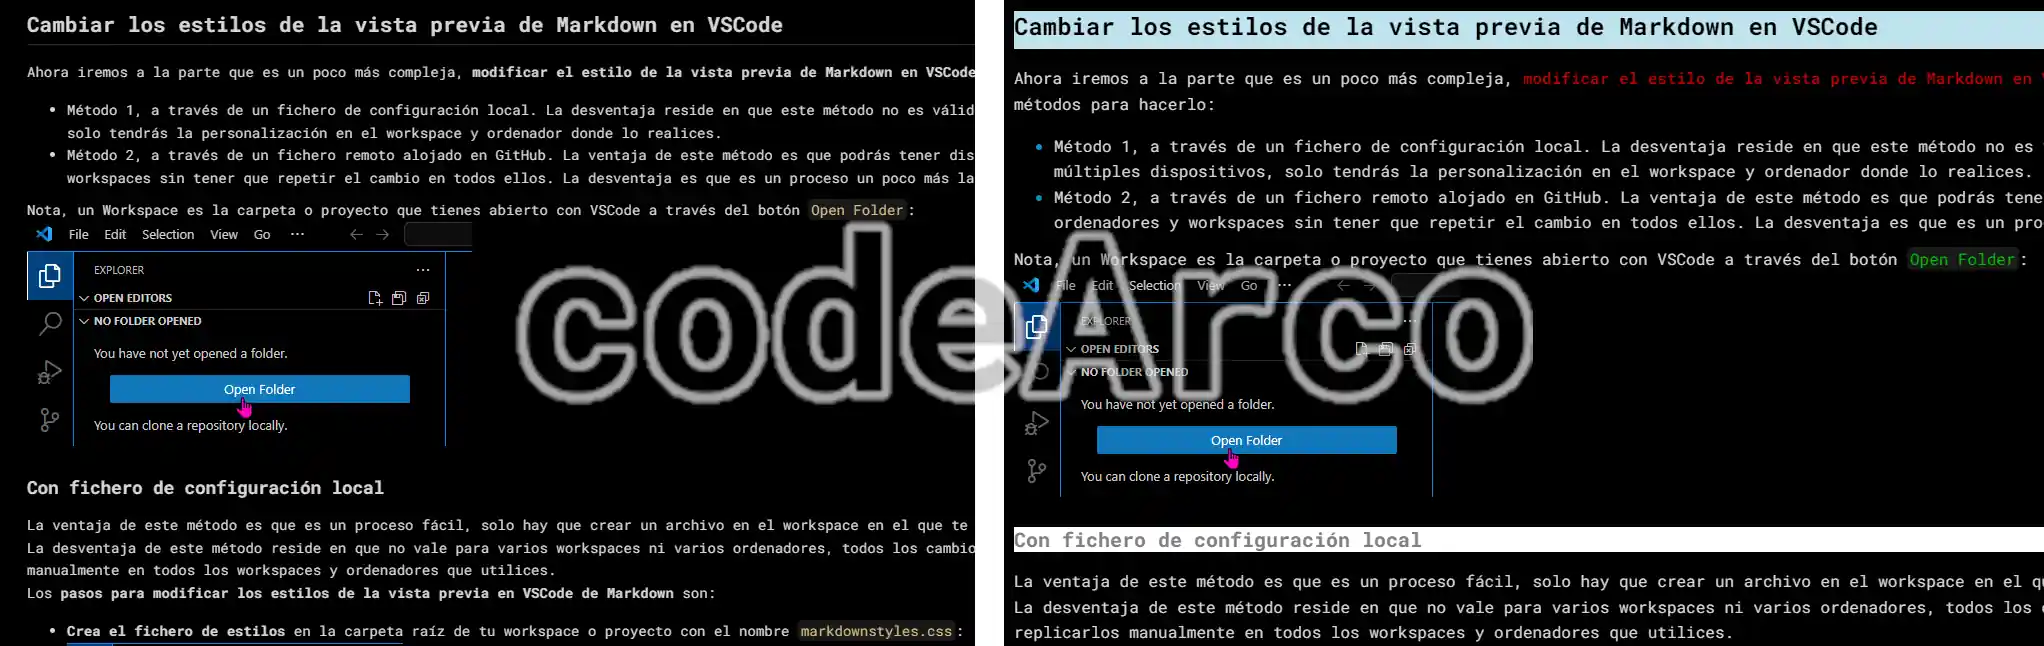
}And here’s the result of customizing Markdown styles in the VSCode preview before and after the changes:
Using a remote configuration file
The advantage of this method is that it’s multi-device and valid for multiple workspaces. You can have your changes fully automatically applied to all of them as long as you have the Settings Sync option enabled, as we saw above.
The disadvantage of this method is that it’s a slightly longer process, it requires uploading the file to GitHub and referencing it from the configuration options.
Keep in mind that we’ll start with the local configuration file example, so you must follow and apply all the steps in the previous section.
The steps to change the Markdown preview style in VSCode are:
- Create a new repository on GitHub, give it a descriptive name, select public and enable the README.md file option to simplify subsequent steps.
- Add the styles file to the repository by selecting
Add File,Create new fileon the repository’s main page. Paste the CSS content above and give it a name with a.cssextension, for example,MarkdownPreviewStyle.css. - Publish the project to GitHub with GitHub Pages. Go to the project’s
Settings, locate thePagessection, and within it, selectDeploy from a branchforSourceandmainandrootforBranch. Click theSavebutton.

Publish GitHub Pages for Markdown preview styles - Wait for the page to be published, you can see the publishing status in the
Actionssection. - Access the published page through the
Deploymentssection in the lower right corner of the project’s main page. Within this section, you can find the URL of the page you just published:

GitHub Pages publications or deployments - Copy the link to the styles file simply adding the name of the file you created to the URL above. In our example, the URL of the published page is
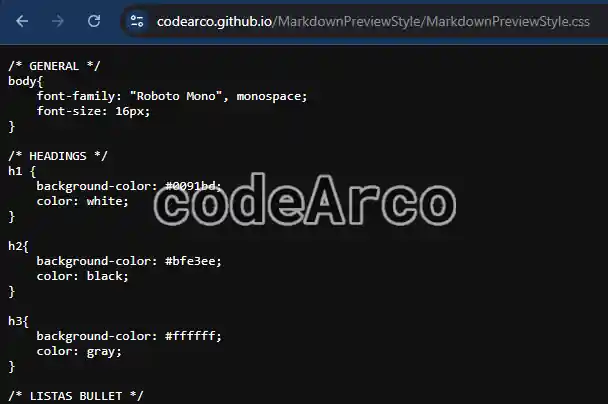
https://codearco.github.io/MarkdownPreviewStyle/and the URL of the CSS file ishttps://codearco.github.io/MarkdownPreviewStyle/MarkdownPreviewStyle.css, this is the file which we will use later. - Verify that the styles are accessible, that is, verify that the above URL returns the CSS content:

Verify accessible styles for Markdown Preview - Change the local reference to the remote one in
settings.json. Simply change the line"markdown.styles": ["markdownstyles.css"]to the line"markdown.styles": ["https://codearco.github.io/MarkdownPreviewStyle/MarkdownPreviewStyle.css"]. - Delete the
markdownstyles.cssfile from your workspace as we won’t need it anymore. - Verify that the styles in the Markdown preview have been applied.
- Verify that the solution is cross-device and cross-workspace. Create a Markdown file in a completely different location from your workspace or project, open its preview, and check that the styles are applied. If you want to test that it’s cross-device, open the file on a different computer where your settings are synced, just as we did before.