
The first step to improve SEO for our website to appear in Google and other search engines is to create the sitemap file but… What is a sitemap?
What is a sitemap?
A sitemap is an XML file that stores all the content of a website in a structured way through links but… What is an XML file?
An XML file allows you to store and structure information using the XML markup language in a way that is easily understandable by humans and robots.
All content is structured using XML nodes or tags, which, in turn, can contain other tags or, directly, the information. These tags are not standard, we can invent the structure as long as the same is followed throughout the XML document. An XML example would be the following:
<myWeb
xmlns="http://www.w3schools.com"
xmlns:xsi="http://www.w3.org/2001/XMLSchema-instance"
xsi:schemaLocation="http://www.w3schools.com
	file:///C:/mySchema.xsd">
	<entry>
		<title> My first entry </title>
		<order> 1 </order>
		<category> News </category>
	</entry>
	<entry>
		<title> My second entry </title>
		<order> 2 </order>
		<category> Tutorials </category>
	</entry>
</myWeb>
Another very important concept within this format are XSD files or XML schemas that allow defining the structure and restrictions that an XML file will have. Following the previous case, an example of an XSD file would be:
<?xml version="1.0" encoding="UTF-8"?>
<xsd:schema xmlns:xsd="http://www.w3.org/2001/XMLSchema">
    <xsd:element name="entry">
        <xsd:complexType>
            <xsd:sequence>
                <xsd:element name="title" type="xsd:string"/>
                <xsd:element name="order" type="xsd:integer"/>
                <xsd:element name="category" type="xsd:string"/>
            </xsd:sequence>
        </xsd:complexType>
    </xsd:element>
</xsd:schema>
But… How do we reference the XSD file in the XML file?: Using the xmlns, xmlns:xsi and xsi:schemaLocation tags within the main node:
xmlns="http://www.w3schools.com"
xmlns:xsi="http://www.w3.org/2001/XMLSchema-instance"
xsi:schemaLocation="http://www.w3schools.com
                 file:///C:/mySchema.xsd"
This information is very useful since it will allow us to verify any sitemap on our website, whether created automatically through third-party tools or created manually, since we know the structure it must follow, as we will see later.
How to create a sitemap
The steps to create a sitemap depend on the type of website we have:
- If our website uses a content manager, such as WordPress or Blogger, they have tools and plugins that generate the file automatically. It is the recommended method to avoid possible manual errors and a lot of work:
- To create a sitemap in WordPress we can do it without any plugin or using, optionally, Yoast and/or Polylang.
- To create a sitemap in Blogger we will use the tools that Google itself provides us.
- If our website does not use a content manager, that is, it is a generic or handmade website, we will have the following alternatives:
- Create a sitemap automatically through an Internet tool such as XML-Sitemaps.
- Create a sitemap manually by creating and writing the corresponding XML file and using, as a reference, the XSD schema corresponding to them.
Types of sitemap
Before proceeding to create a sitemap for our website, we must keep in mind that there are several types of sitemap and that not all of them are sent to search engines.
XML Sitemap
Designed for robots, they are sent to search engines.
Within this category, in turn, we can find several types of XML sitemap:
- Static content sitemap. The static content of a website is that which does not change much over time, such as, for example, the WordPress pages used for sections such as “About me”, “Contact”, etc.
- Dynamic content sitemap. The dynamic content of a website is that which changes and is constantly updated over time, such as, for example, WordPress posts or articles.
Here is an example of an XML sitemap, although we will go into detail later:
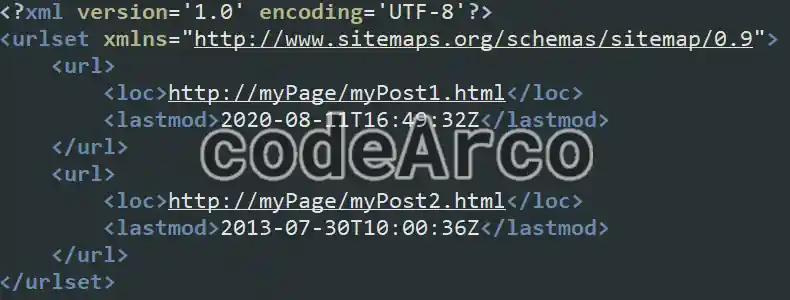
These will be the files that we will deal with throughout the SEO course because they are those that allow us to indicate the structure of the website to the search engine robots and, as a consequence, appear indexed in the search results to improve SEO.
HTML sitemap
Designed for humans, they are not sent to search engines.
The main task of these files is to improve the usability of the website and the user experience, allowing a user to know, at a glance, the basic structure of the website and to be able to navigate it comfortably.
While the XML format has a closed format that follows a structure that we cannot invent, the HTML format is completely free, each website can implement it as it sees fit.
An example of an HTML sitemap could be the navigation menus that appear at the top of a website or, as in the case of Wikipedia, the content indexes:

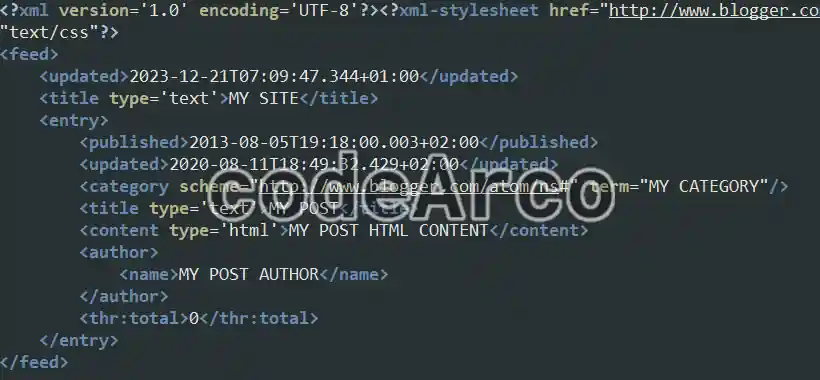
Sitemap RSS or ATOM
Used by robots and humans, they are not sent to search engines.
They are used by software and programs called RSS feed readers, such as Inoreader. These programs are what users use to subscribe to a web page and obtain alerts with the latest entries on the site.
The difference between an XML sitemap vs RSS or ATOM sitemap is that the first is much more summarized since it only contains the link to the entry along with the date of the last modification, while the second has all the content in the XML file to be displayed by the aforementioned programs.
Create sitemap in WordPress
In this section we will see three ways to generate the WordPress sitemap for free and with a little effort:
- Create the sitemap in WordPress without a plugin, for which we will need to adjust and review some content manager options.
- Create the sitemap in WordPress with the Yoast SEO plugin. We will see what options and sitemaps this plugin offers us to improve the SEO of our website.
- Create the sitemap in WordPress with a multilingual website, for which we will use the Polylang plugin.
Generate sitemap in WordPress without plugin
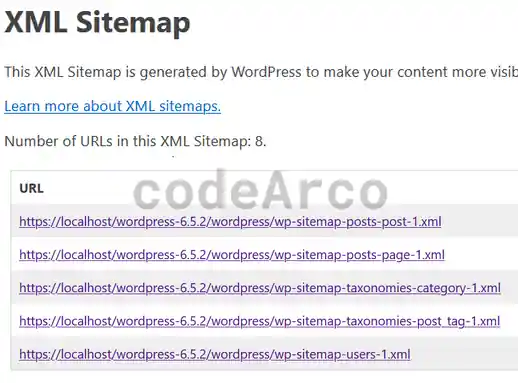
The simplest option is to use the sitemaps that WordPress offers by default, among which we find:
- wp-sitemap-posts-post-1.xml. XML file with the posts or articles.
- wp-sitemap-posts-page-1.xml. XML file with the static pages of your website.
- wp-sitemap-taxonomies-category-1.xml. XML file with the categories.
- wp-sitemap-taxonomies-post_tag-1.xml. XML file with tags.
- wp-sitemap-users-1.xml. XML file with publications grouped by author.
The steps to generate the sitemap in WordPress without a plugin are:
- Verify that you have version 5.5 or later of WordPress.
- Verify that, within the general options, reading section, you have disabled the option “Discourage search engines from indexing this site”.
- Within settings, permalinks, verify that you have an option other than the plain one, for example, “Custom structure” with the value “www.mySite.com/%category%/%postname%/”.
Once we have verified the previous points we can access the files by adding to the root path of our website (for example www.myWeb.com) the suffix “/wp-sitemap.xml” (for example www.myWeb.com/wp-sitemap.xml), this will be the address that we will send to search engines like Google or Bing.
Generate sitemap in WordPress with Yoast plugin
One of the free and most used WordPress plugins for SEO is Yoast. The steps to generate the sitemap for WordPress with the Yoast plugin are:
- We will go to the “Settings” section, “Site Features” inside plugin settings. Within this we will find the “XML Sitemaps” section, check that it is activated.
- Add “/sitemap_index.xml” to the root of your website to access the xml files generated by Yoast SEO (for example www.myWeb.com/sitemap_index.xml), this will be the route that we will send to search engines like Bing or Google.
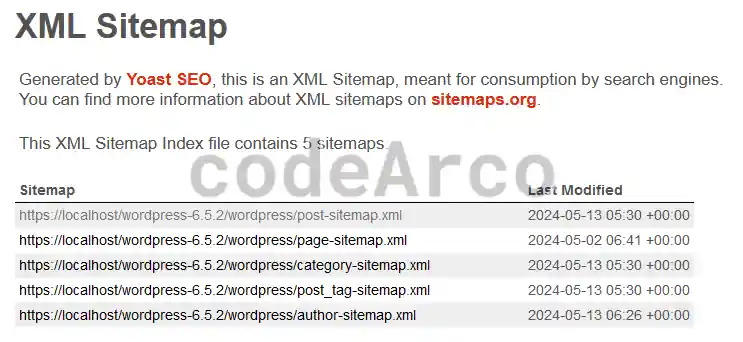
Yoast’s default sitemaps are exactly the same as those generated by WordPress:
Generate sitemap in WordPress with multilingual website
We will assume that we use the plugin Polylang to translate our website. This method is compatible with the two previous methods, whether we generate the map through WordPress without a plugin or if we generate it through Yoast SEO.
The steps to create a multilingual sitemap on our website are:
- Verify that you have followed the steps in the previous tutorials to generate a sitemap, whether it is the one that generates the file without a plugin or the one that generates it using the Yoast plugin.
- Install the Polylang plugin and follow the initial setup steps.
- Make sure you have at least two languages and one default.
- Translate your posts, categories and tags.
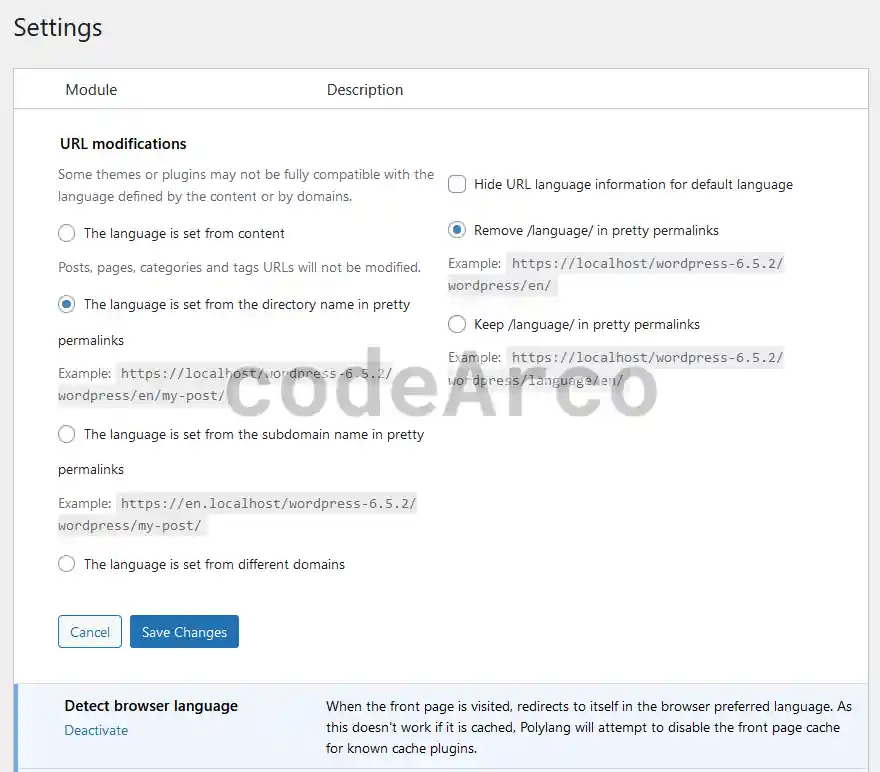
- In the plugin settings you must establish how the languages are indicated in the urls, in our case we will use folders for the languages. Also, select the option to “Remove /language/ in pretty permalinks”.

Sitemap in WordPress with multilingual web urls - As a recommendation, check the “Detect browser language” option.
- Once your articles are published, you now have your multilingual sitemap available through the corresponding url, that is, “/wp-sitemap.xml” for the map generated with WordPress and without a plugin or “/sitemap_index.xml” for the map generated with Yoast. This will be the file that we will send to search engines like Google or Bing.
As you can see in the following image, this plugin does not create a multilingual sitemap as we talked about in the International SEO section, what really happens is that, having translated the different articles, categories and tags, within the sitemap we have all the content in the different languages:
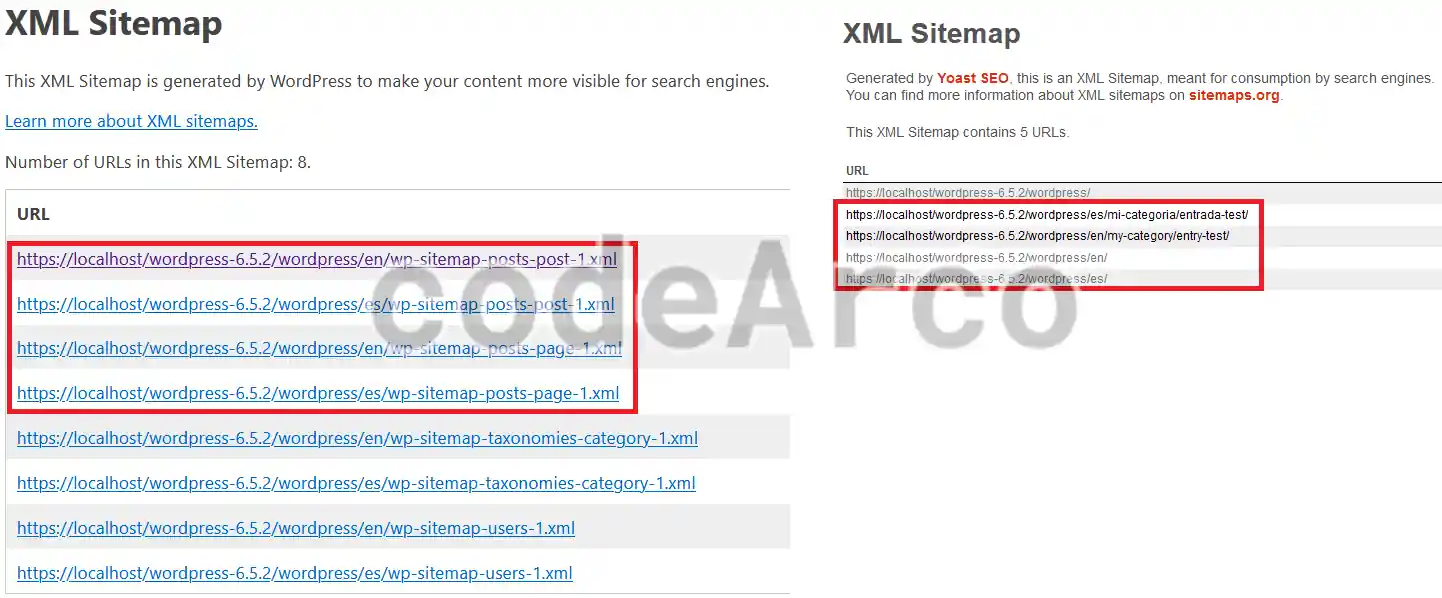
This approach is not incorrect since, as indicated by Google and the multilingual documentation, if we use html lang and hreflang link on each of the pages and posts (just as the WordPress plugin does) it is not necessary to include this information in the sitemap, although it is completely mandatory that your file includes all the pages in all languages.
Create sitemap in Blogger
Today, Blogger create two types of sitemaps completely automatically:
- sitemap.xml. XML file with the dynamic content or posts of your blog. This file contains all the posts that you create in your daily life as a content creator.
- sitemap-pages.xml. XML file with the static content or pages of your blog. This file contains static pages such as “Contact”, “About me”, etc.
Both are accessible from the root and, therefore, all you will have to do is add /sitemap.xml and /sitemap-pages.xml to the url of your blog in Blogger, leaving both as follows:
- myBlogInBlogger.com/sitemap.xml
- myBlogInBlogger.com/sitemap-pages.xml
It is very important to keep in mind that, although Blogger is automatically responsible for creating the files, both files must be sent to Google since they are complementary, that is, the content of both is different and what one has, the other does not have.
Create sitemap automatically for any website
Automatic sitemap generators are websites or software (some of them paid, depending on the volume of your website) where we will enter the address of the page for which we want to generate the file and, after a few minutes of being analyzed, they will provide us with the XML file from our site.
Some examples of websites to generate sitemaps are:
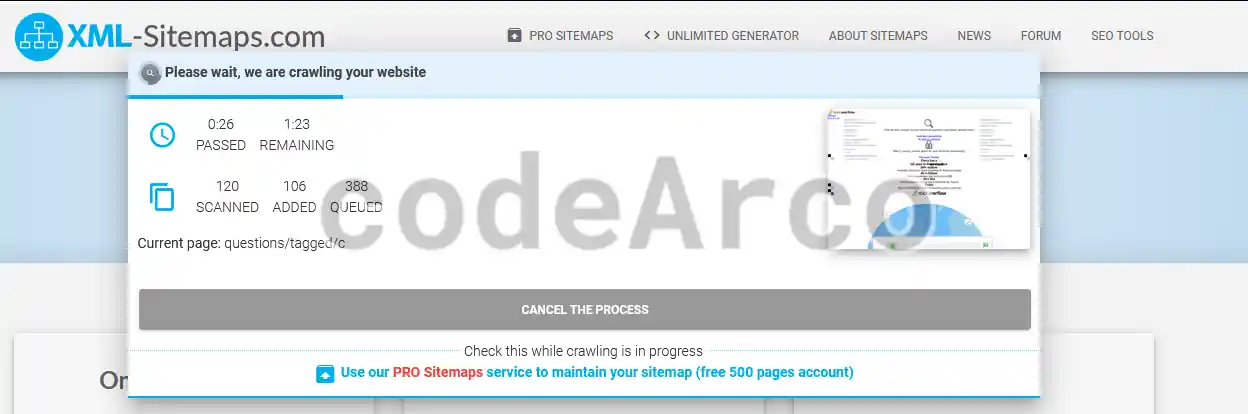
- XML-Sitemaps. Partially free tool, it allows you to create a file with up to 500 free entries and, if there are more, we will have to use the paid option that allows up to 1.5 million indexed pages.

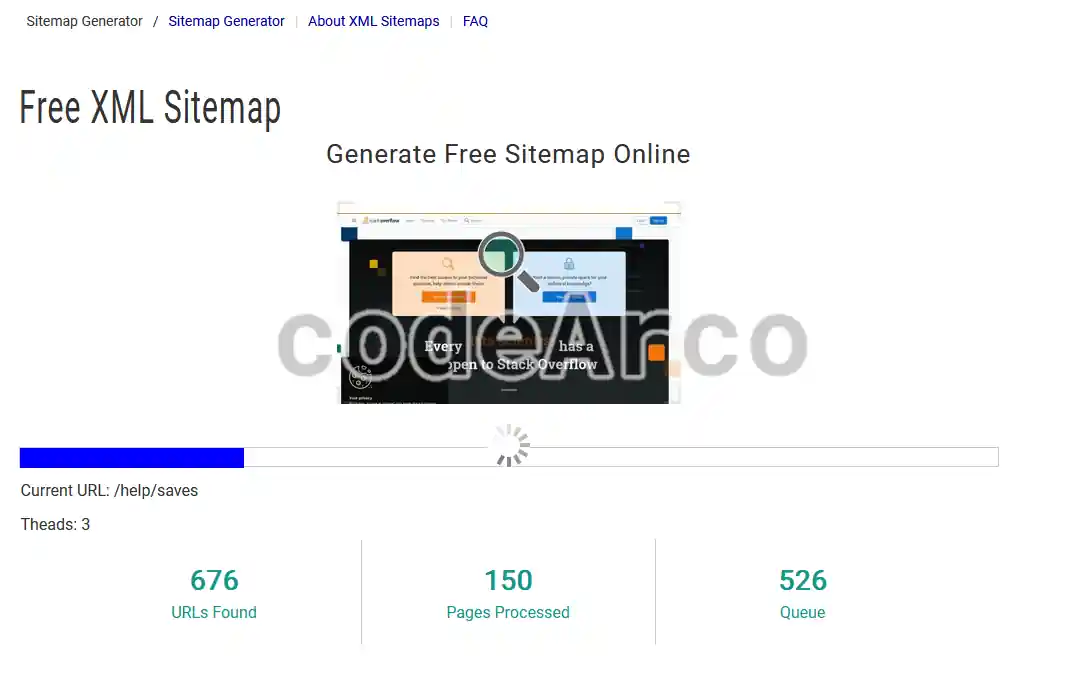
XML-Sitemaps automatic sitemap generator - My sitemap generator. Also a partially free tool, it allows you to launch 3 free requests per day and, if there are more, we must use the paid option.

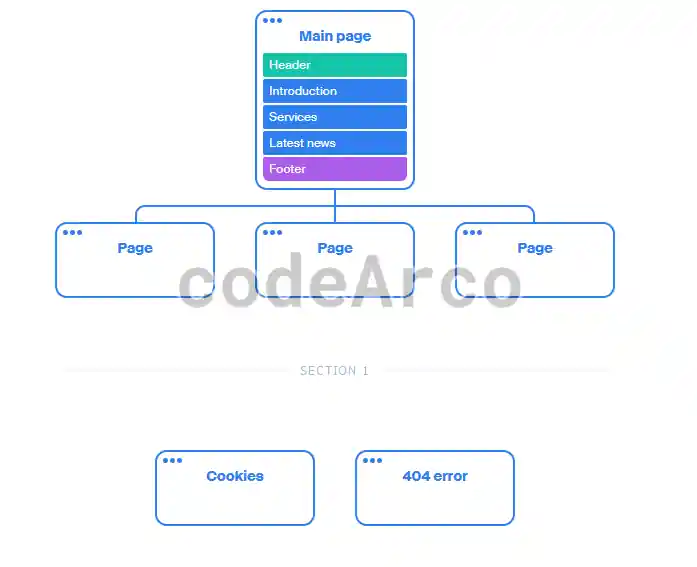
Automatic sitemap generator My sitemap generator - Octopus sitemap generator. It allows you to create a file with up to 300 pages for free. The most interesting part of this tool is that it also generates a visual map of the site where we can see, at a glance, all of our blog posts along with their category structure:

Octopus automatic and visual sitemap generator
Create sitemap manually for any website
Although automatic sitemap generators are very convenient, they are also, for the most part, paid. If we have a small website and we do not have the free WordPress or Blogger tools to automatically create the file for our website, the recommended option is to create the sitemap manually.
It is important to keep in mind that this is not the recommended option for large websites and sites made with content managers such as WordPress or Blogger, since these already come with free tools to create them.
The first step to create a sitemap manually is to know its structure and, as we said before, this is found in the XSD or XML structure of the sitemaps.
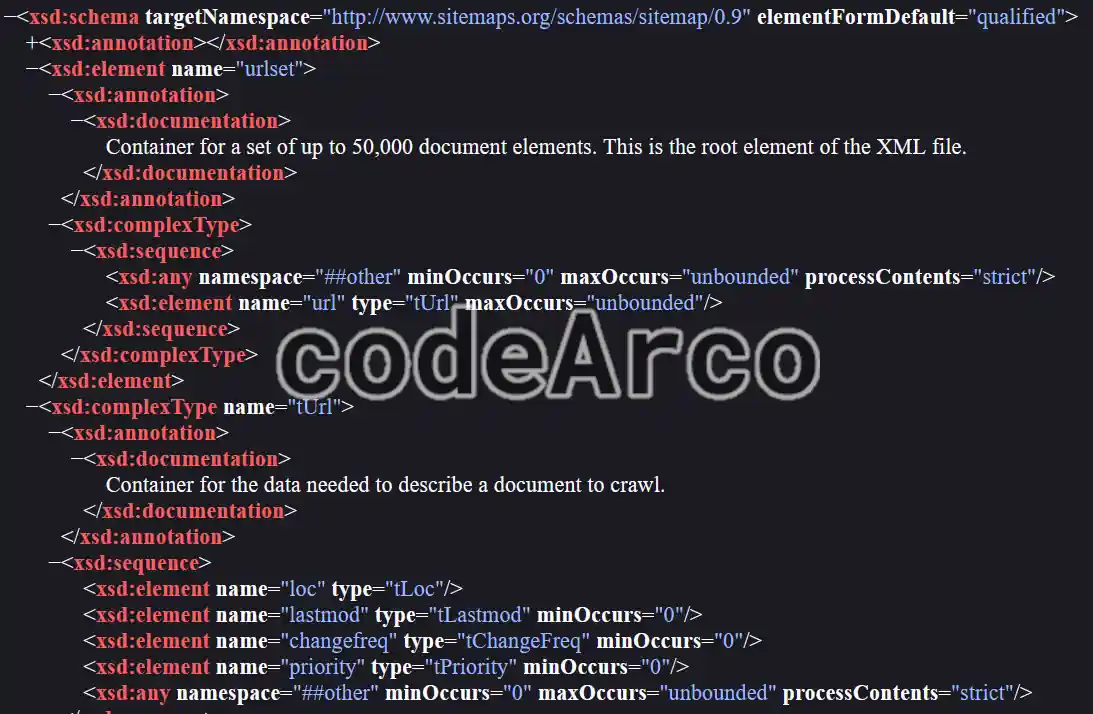
The most important parts of a sitemap are:
- Urlset, node that will have all the content of our sitemap.
- Url, nodes that go inside urlset, one for each post or page on our website, there is no maximum number of url nodes.
- Loc, node within url, indicates the url or address where the post is, it is the only mandatory element.
- Lastmod, a node within the url, indicates the date of the last update of the specific page, used by search engines to know when a post has been updated to revisit and re-index it. Optional element.
With this information we can build the following manual sitemap example:
<?xml version='1.0' encoding='UTF-8'?>
<urlset xmlns="http://www.sitemaps.org/schemas/sitemap/0.9">
    <url>
        <loc>http://myWeb.com/Post1.html</loc>
        <lastmod>2020-08-11T16:49:32Z</lastmod>
    </url>
    <url>
        <loc>http://myWeb.com/Post2.html</loc>
        <lastmod>2013-07-30T10:00:36Z</lastmod>
    </url>
</urlset>
Verify that a sitemap is correct
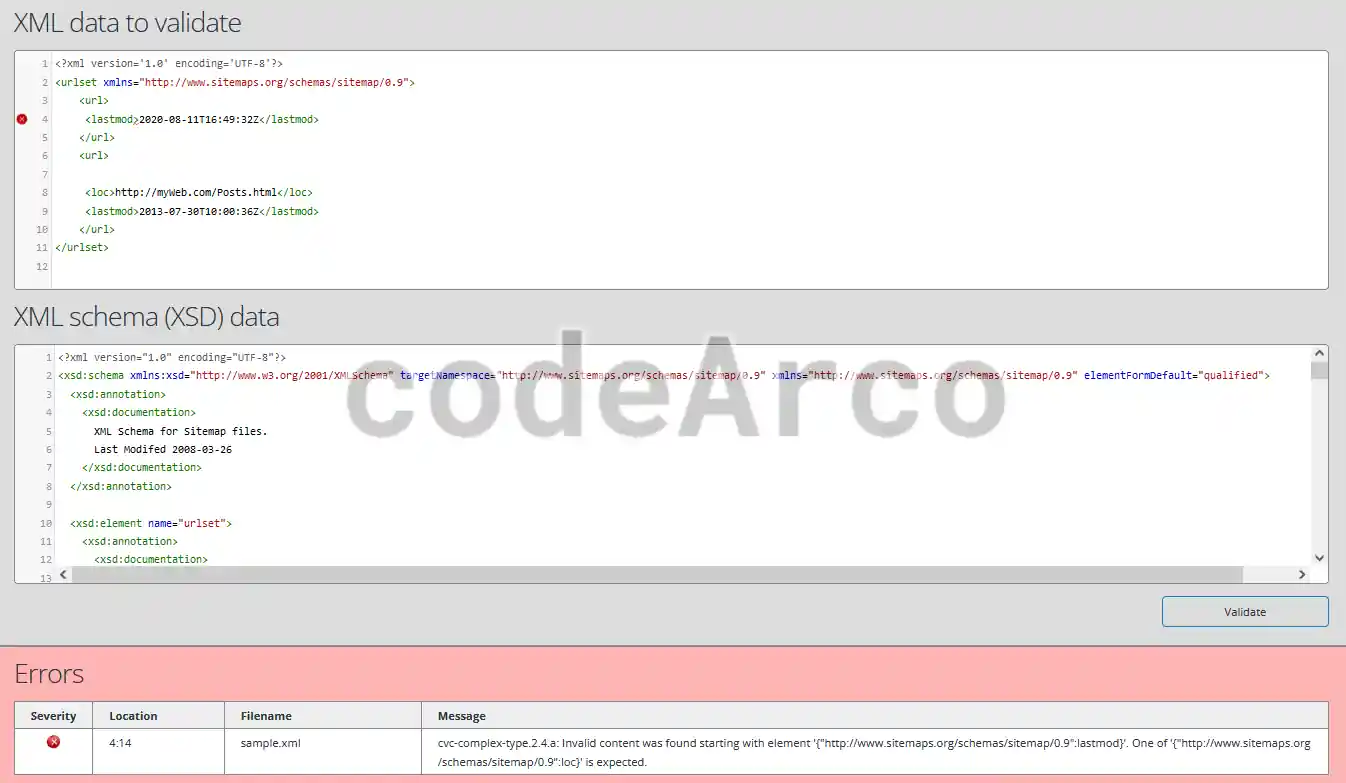
Once we know that a sitemap is nothing more than an XML file that, in turn, has an associated XSD file that defines its structure, the process of verifying the file consists of checking that the generated XML file complies with the rules of the XSD file or XML structure of the sitemaps.
On the Internet, there are multiple tools to verify sitemaps, such as the following:
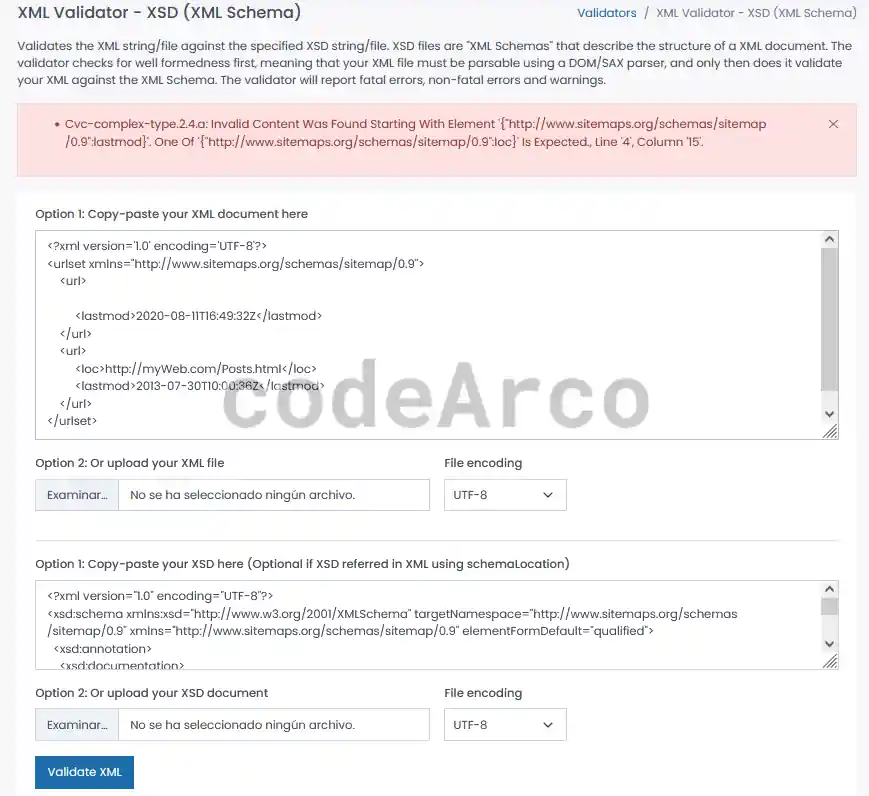
- XML validator XSD. Generic tool that allows you to verify that an XML complies with its corresponding XSD. It is important that the XSD file is attached explicitly, either through a file or by pasting the corresponding code, otherwise it will only verify the structure of the XML.

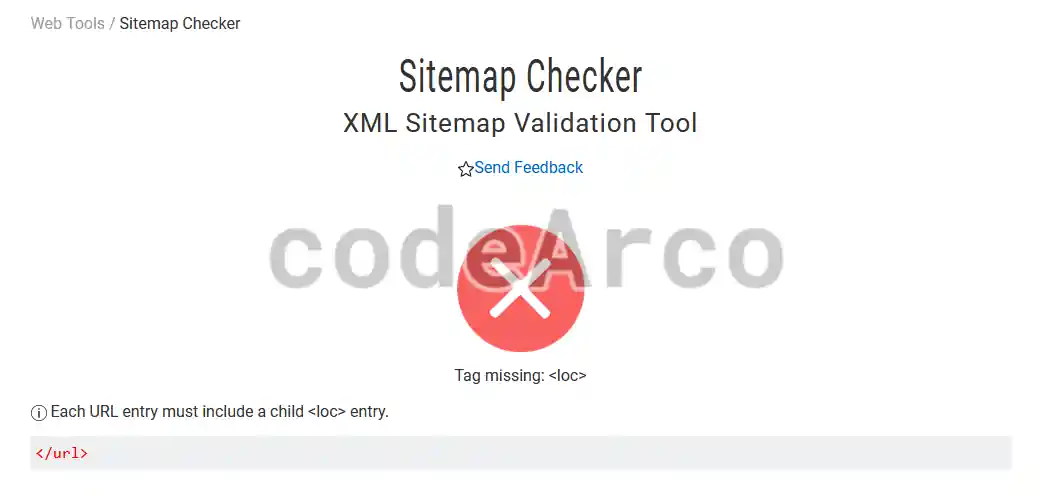
Verify sitemap with XML validator XSD - My sitemap generator. Specific tool to verify sitemaps, it is not necessary to include the corresponding XSD file, attaching the XML file is enough.

Verify sitemap with My sitemap generator - XSD validator. Again we have a generic tool to verify XML and XSD where we must upload both files.

Verify sitemap with XSD validator
Finally, once we have created and verified the XML files, we must not forget to send the sitemap to Google, Bing and other search engines so that they index the content of our website.